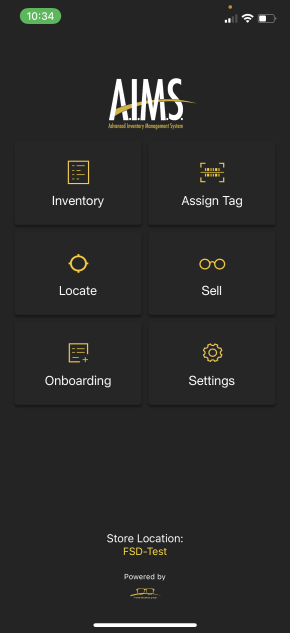
Advanced Inventory Management System - Store User Manual
As an optician, you may have always been bothered by thinking about your business processes, logistics and inventory management --- you want each and every part of your business to run smoothly and seamlessly. The problem is there are a lot of solution out there that you end up investing in too many solution systems that it even complicates everything further.
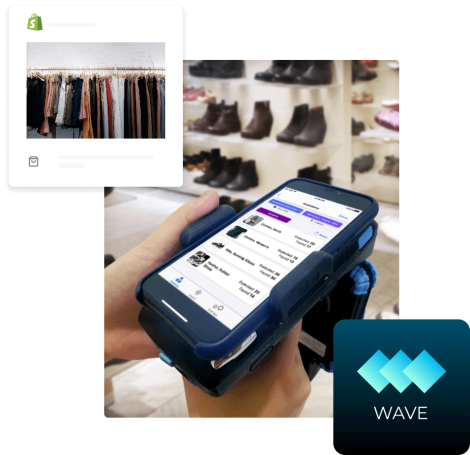
That being said, Frame Source Group has developed a solution that will integrate your inventory, sales, and logistics process in an all-in-one package.
In this manual, we teach you how to use the software and all its features.
Follow the steps below if you're commissioning new frames with UPC barcodes.
- Turn on your handheld scanner and A.I.M.S app. Pair them through the handheld reader's Bluetooth.
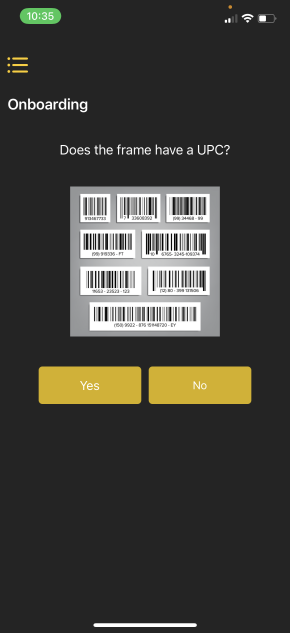
- After you've paired successfully and login to A.I.M.S, tap on Onboarding.
- Since we're commissioning frames with UPC barcode, tap Yes on the next screen.
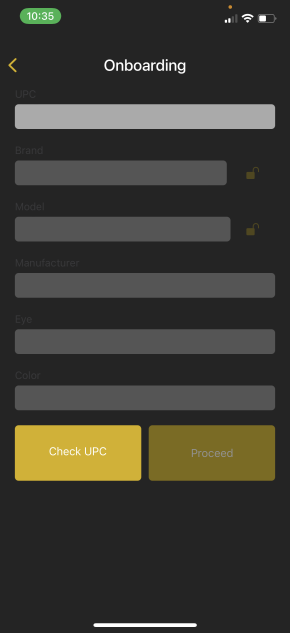
- The next step will show you several fields of item information. Please scan the barcode using your handheld reader and it will populate the fields. When you're happy with the details in the field, please hit Proceed.
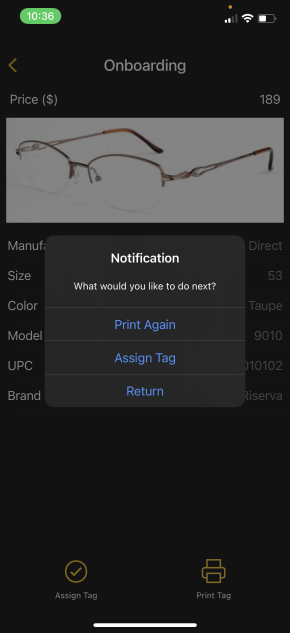
- You will then see an image of the frame that you just tagged. If this matches the item you want to commission, you can move ahead and add a price in the * Input Price* field.

- After you input the price, you will be asked to either Print the tag or Assign the Tag. What you want to do is to print the tag first before assigning the tag with a QR code.
- When you have succesfully printed a tag, you can now assign the tag using it's RFID number. You scan the tag using your reader and it will return the information in this field.
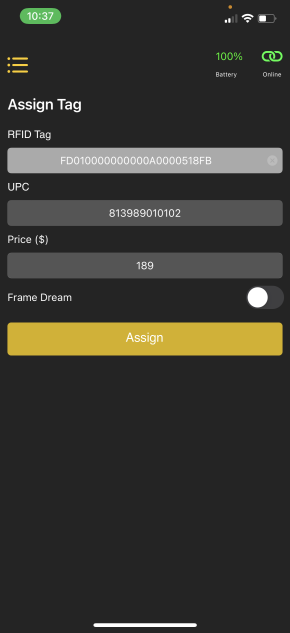
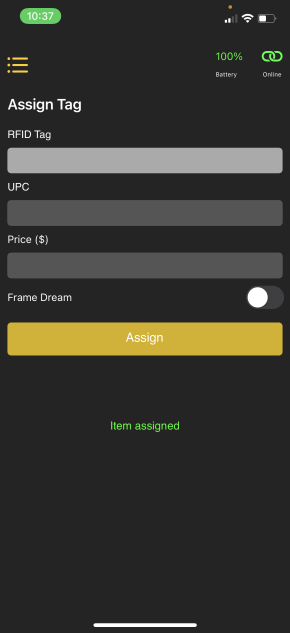
- Once you're happy with the information on the screen, tap on the Assign button. You have now succesfully commissioned a frame using the A.I.M.S app!


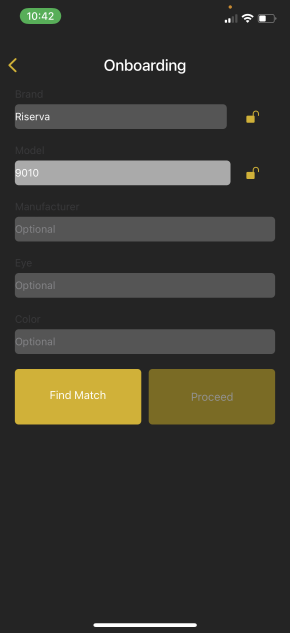
Follow the steps below if you're commissioning new frames without UPC barcodes.
- Turn on your handheld scanner and A.I.M.S app. Pair them through the handheld reader's Bluetooth.
- After you've paired successfully and login to A.I.M.S, tap on Onboarding.
- Since we're commissioning frames without a UPC barcode, tap No on the next screen.
- The next step is to key in the item's Brand and Model as shown below.
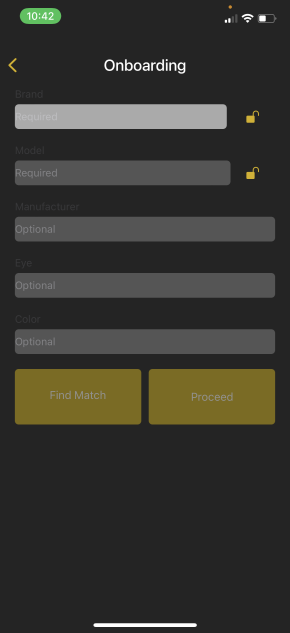
- Afterwards tap the Find Match button to search for the frame information in the database. When the system finds the frame matching the brand and model of your frame, hit Select then the Proceed button.
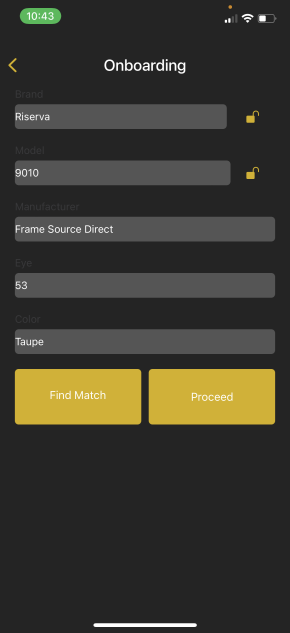
- You will then see an image of the frame that you just tagged. If this matches the item you want to commission, you can move ahead and add a price in the * Input Price* field.
- After you input the price, you will be asked to either Print the tag or Assign the Tag. What you want to do is to print the tag first before assigning the tag with a QR code.
- When you have succesfully printed a tag, you can now assign the tag using it's RFID number. You scan the tag using your reader and it will return the information in this field.
- Once you're happy with the information on the screen, tap on the Assign button. You have now succesfully commissioned a frame using the A.I.M.S app!


If and when you're happy with the items you commissioned in your Inventory, we can now start checking if all your items can be picked up by your handheld scanner.
Please follow the steps below to take your first inventory scan:
- Open your A.I.M.S. app. Make sure that your handheld is connected.
- Tap the Inventory button. It should show you all the items you have commissioned to your inventory.


- To know what you currently have available in stock, take your handheld and pull the trigger. You might have to move around a bit to make sure you pick up all the tags that are physically available in your store.
- You can keep repeating this cycle until such time you've picked up all the items you are expecting to have. It shouldn't take more than a few minutes for a couple of thousand items.
- When you're happy with the scan, tap on the Send Report icon, on the bottom right of the page, to save your inventory.

- In case your handheld picked up tags that are not currently in your inventory, it will show up as a number above the Send Report button. If you want to add these items to your inventory, just mark the tick box and then hit submit.

Congratulations! You're all done with your daily scan. You may now proceed to get on top of your Work Queue using A.I.M.S web UI, Probe.
When you're done taking your inventory, you'd more or less have an idea what frames you lack. Processing an order is a breeze once you get the process down to a T.
Please follow the steps below in ordering your frames:
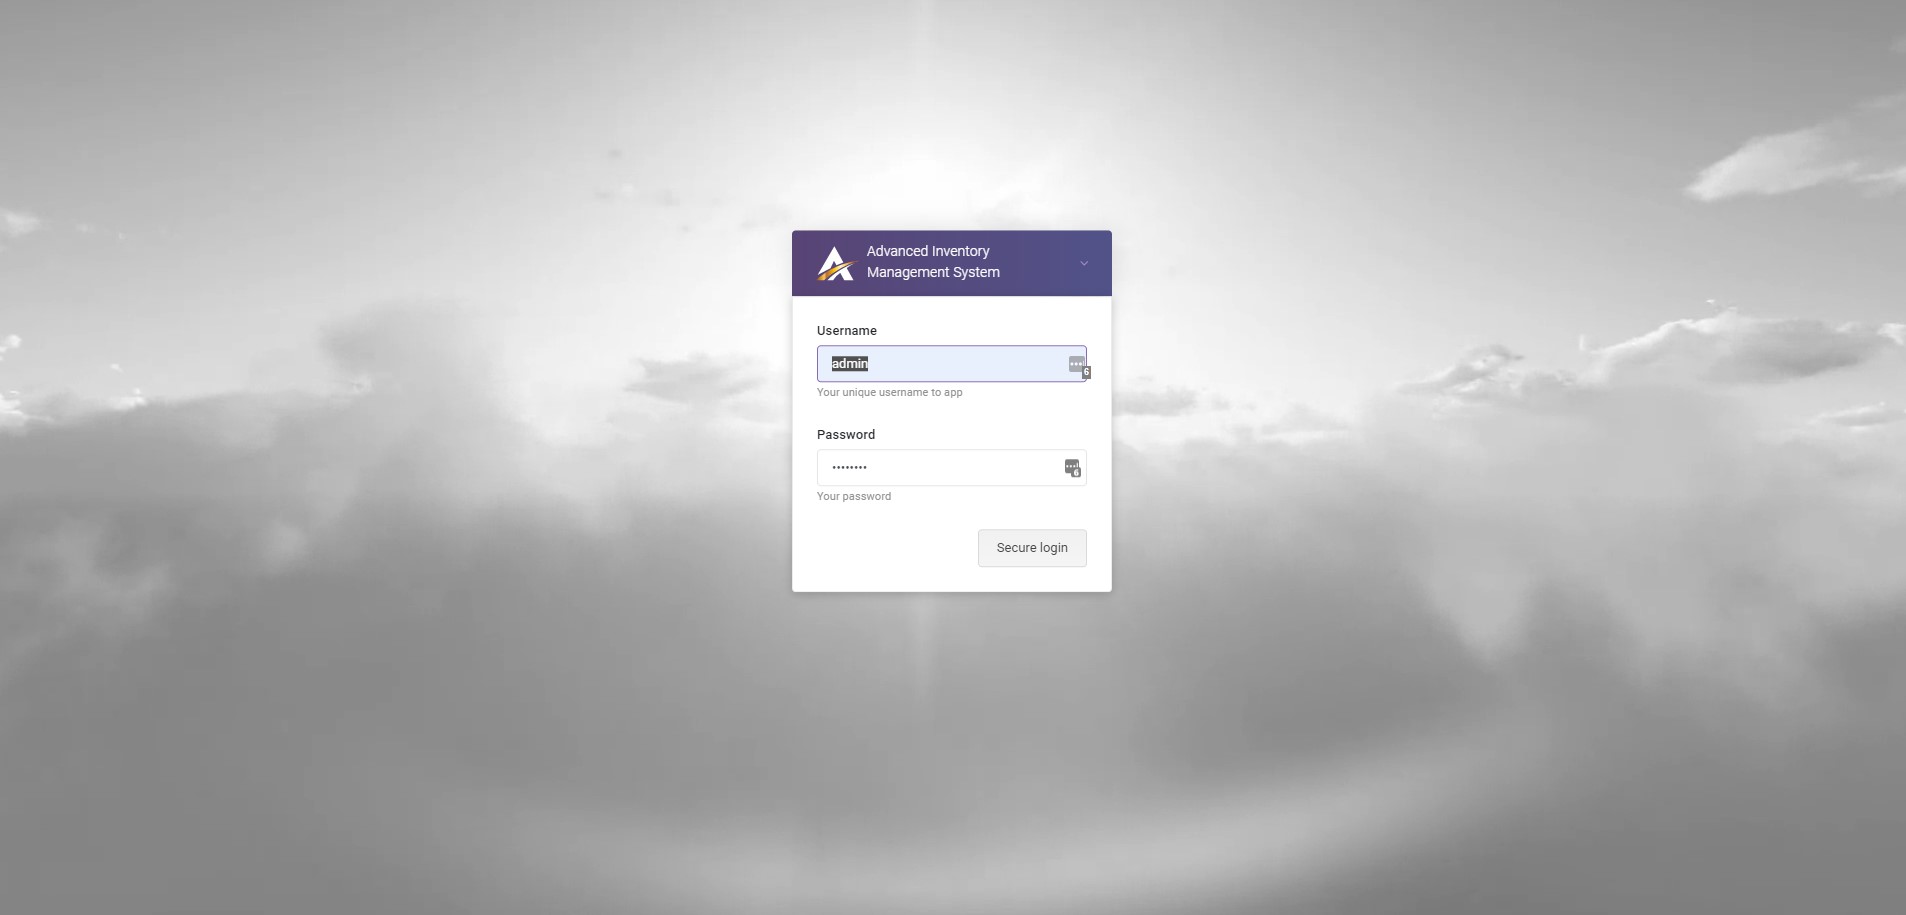
- Log-in to Probe A.I.M.S.
- Click on the Inventory page. It should show the total inventory you currently have.
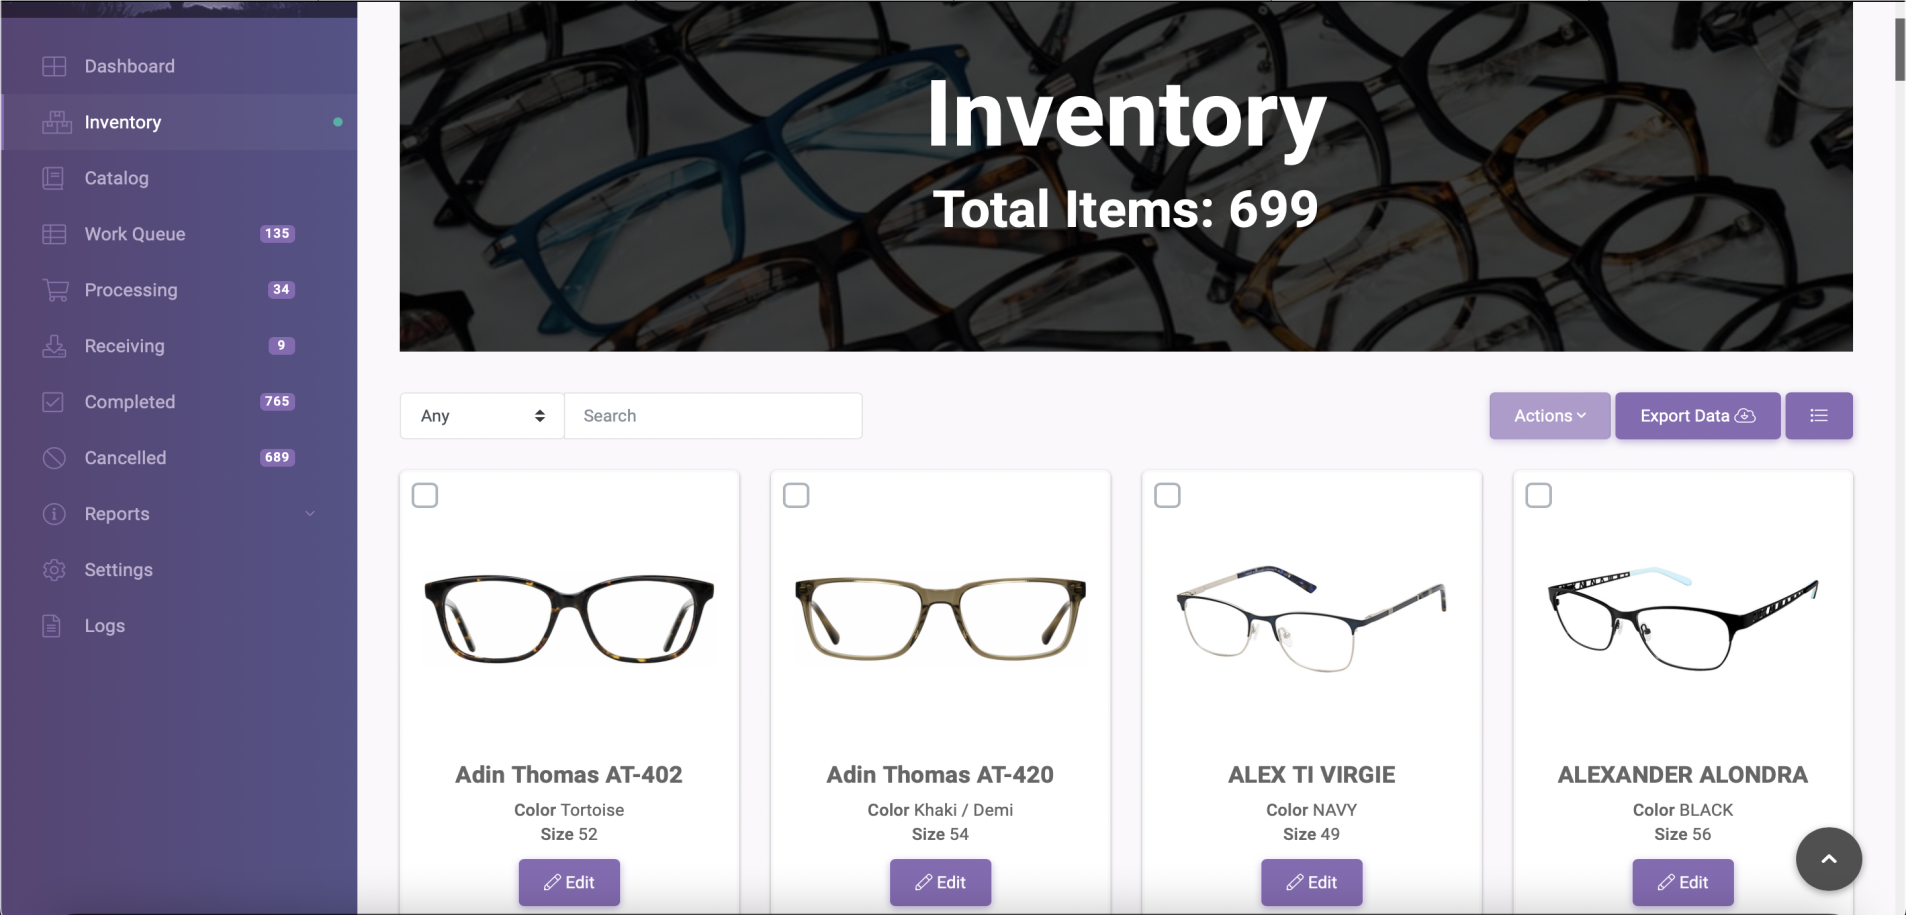
- There are several ways you can search for a frame in your Inventory page. You can manually scroll to look for the item or use the search field (and advanced search parameters) to narrow down the Inventory list.
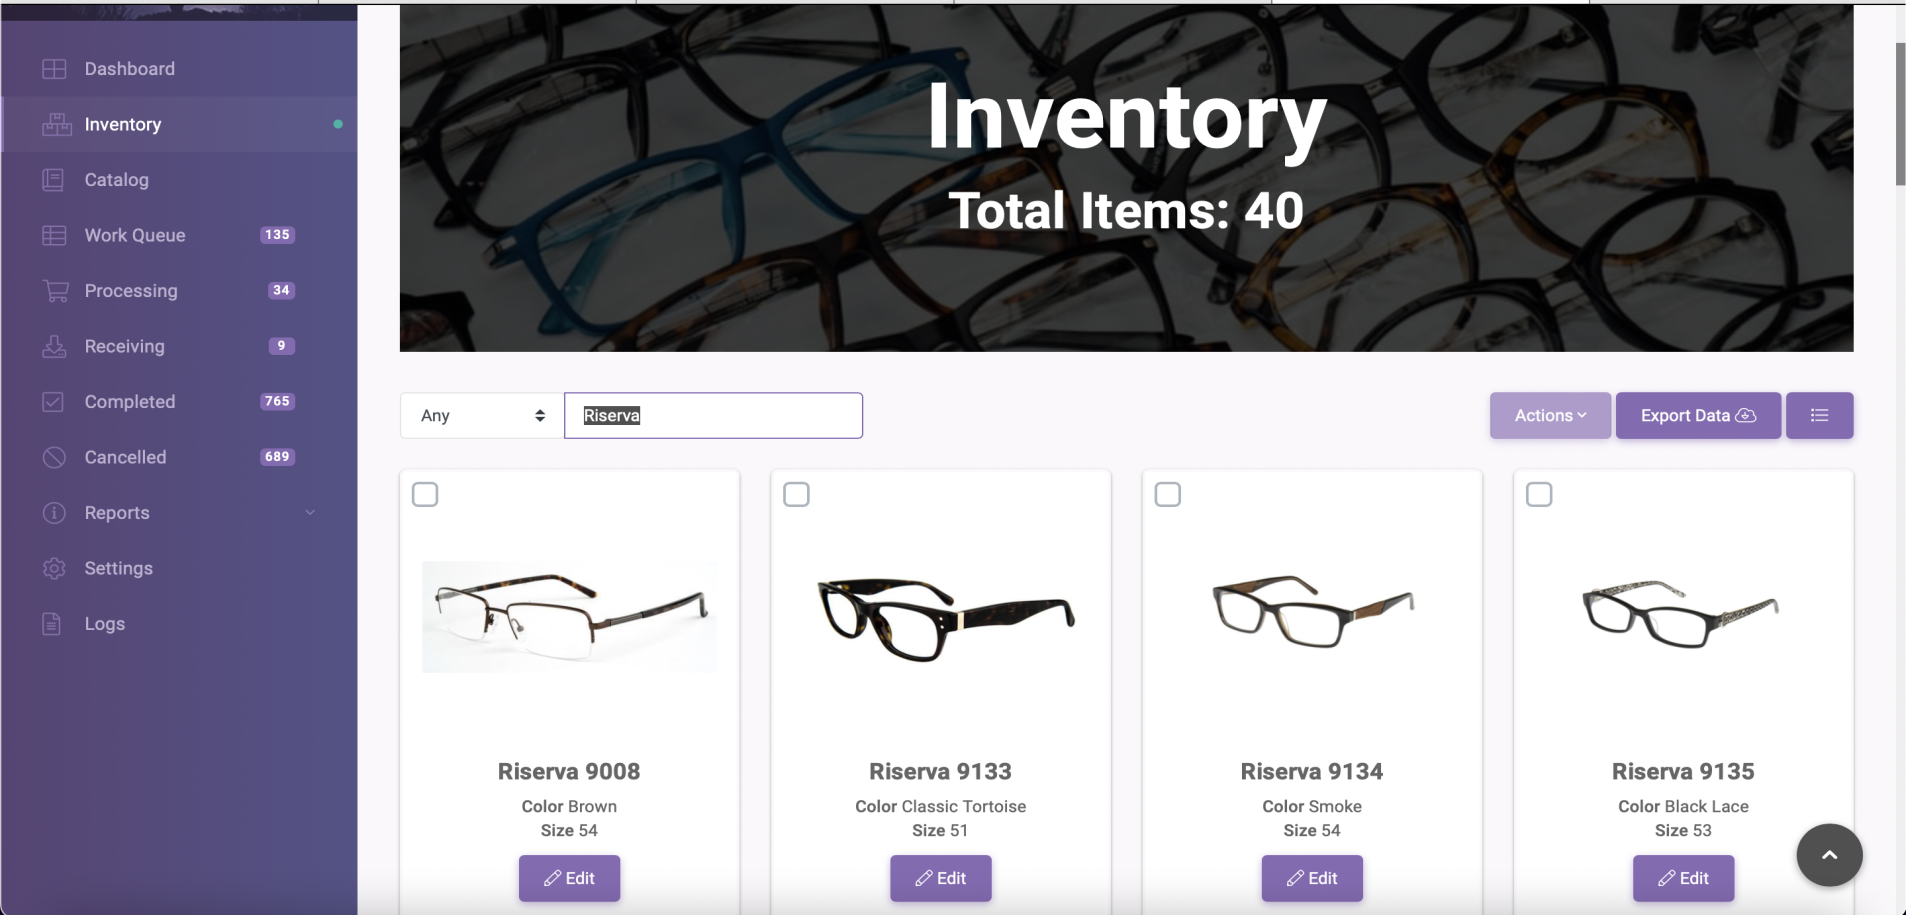
- When you find what you're looking for, tick the checkbox on the upper left of each item to select the frames.
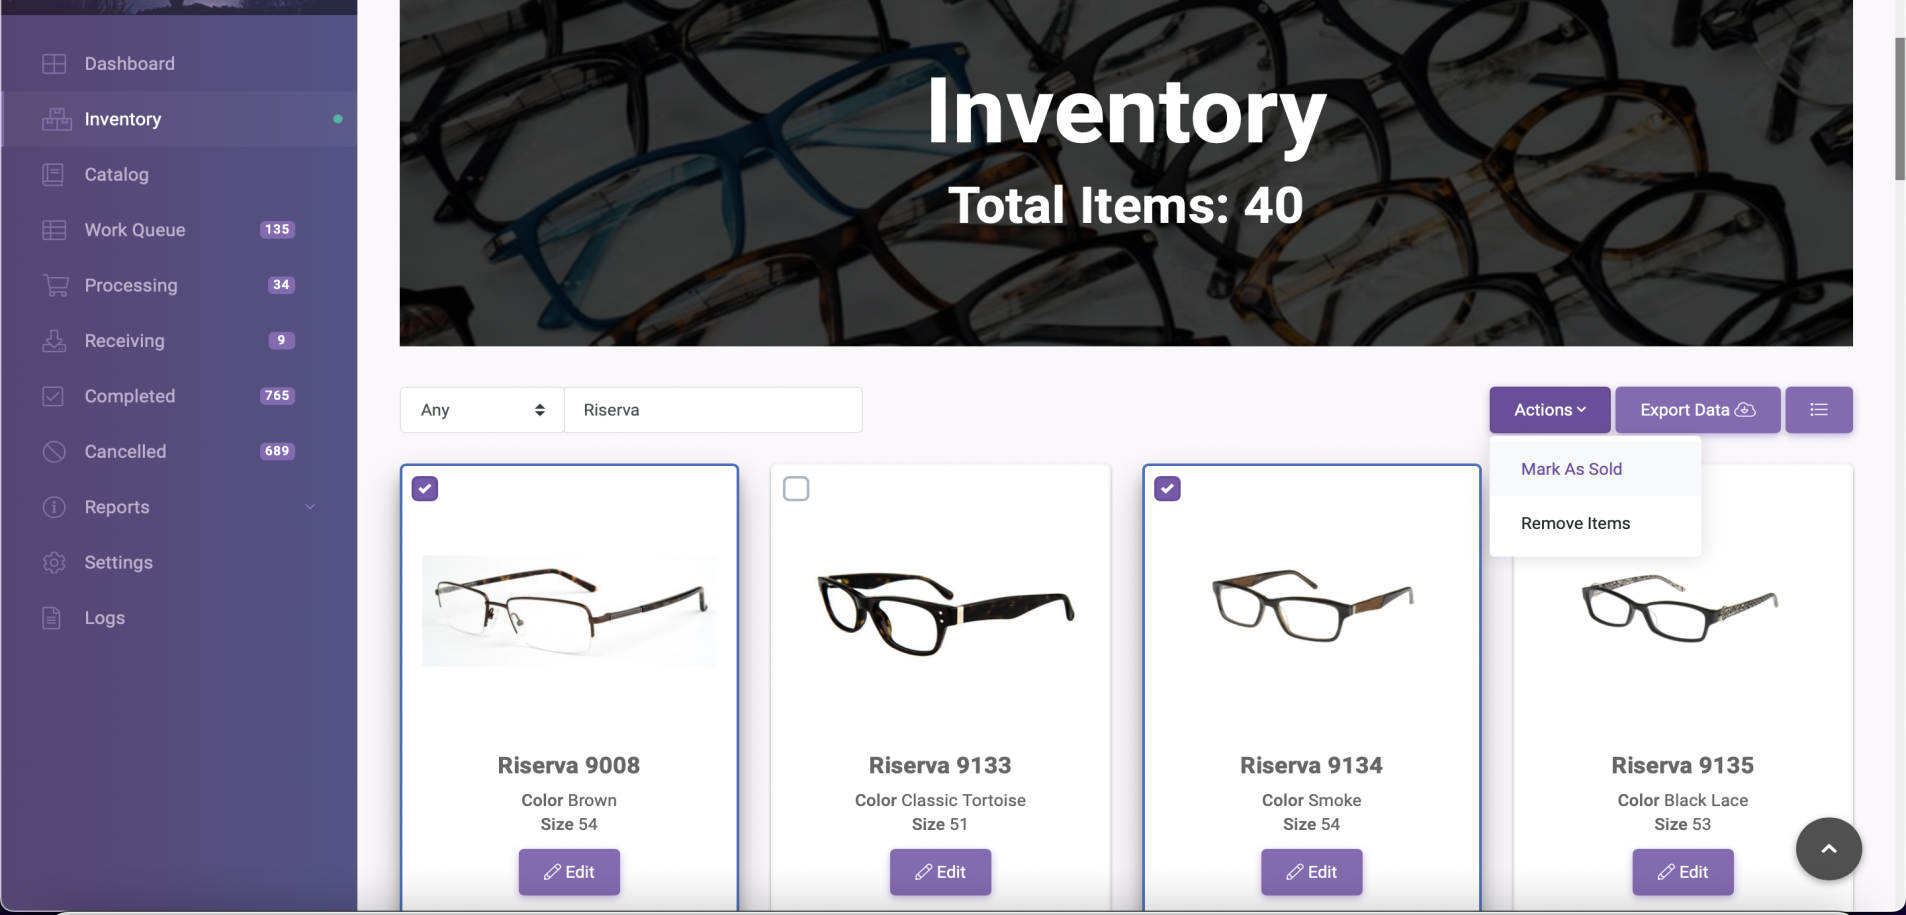
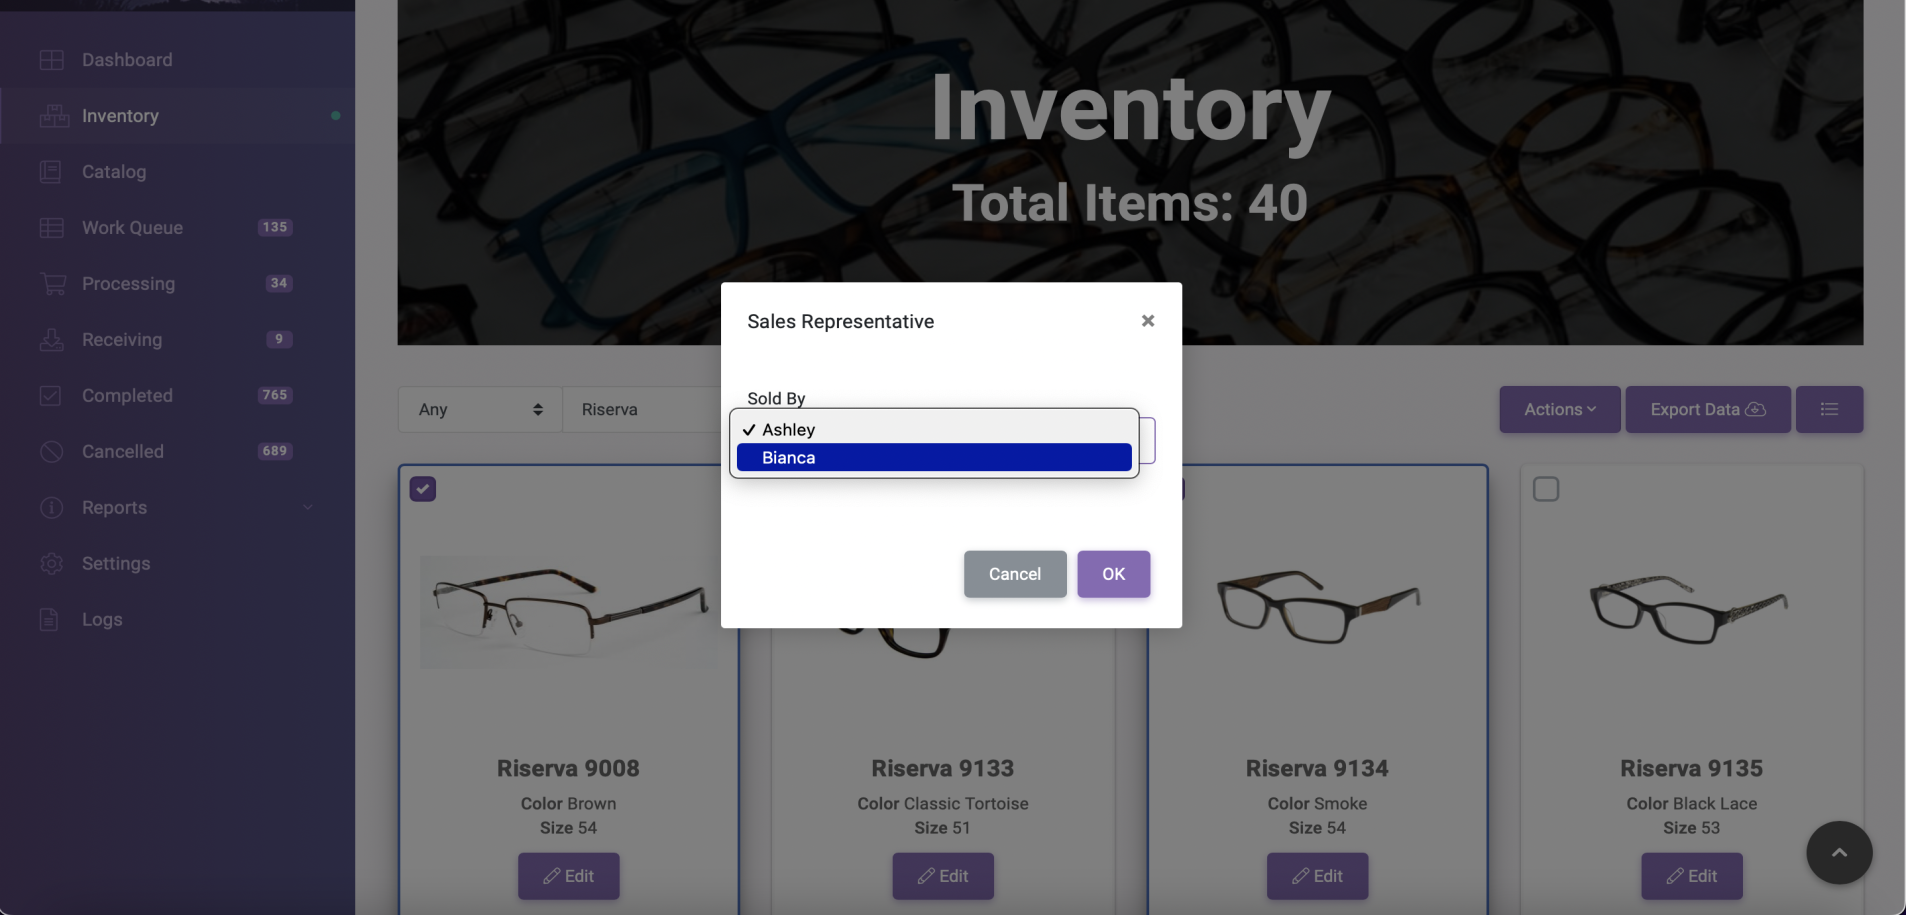
- After selecting all the items you've sold. Click the Actions drop down menu and select Mark as Sold. It will then pop-up a small window. You can find your name amongst the roster or type it in.
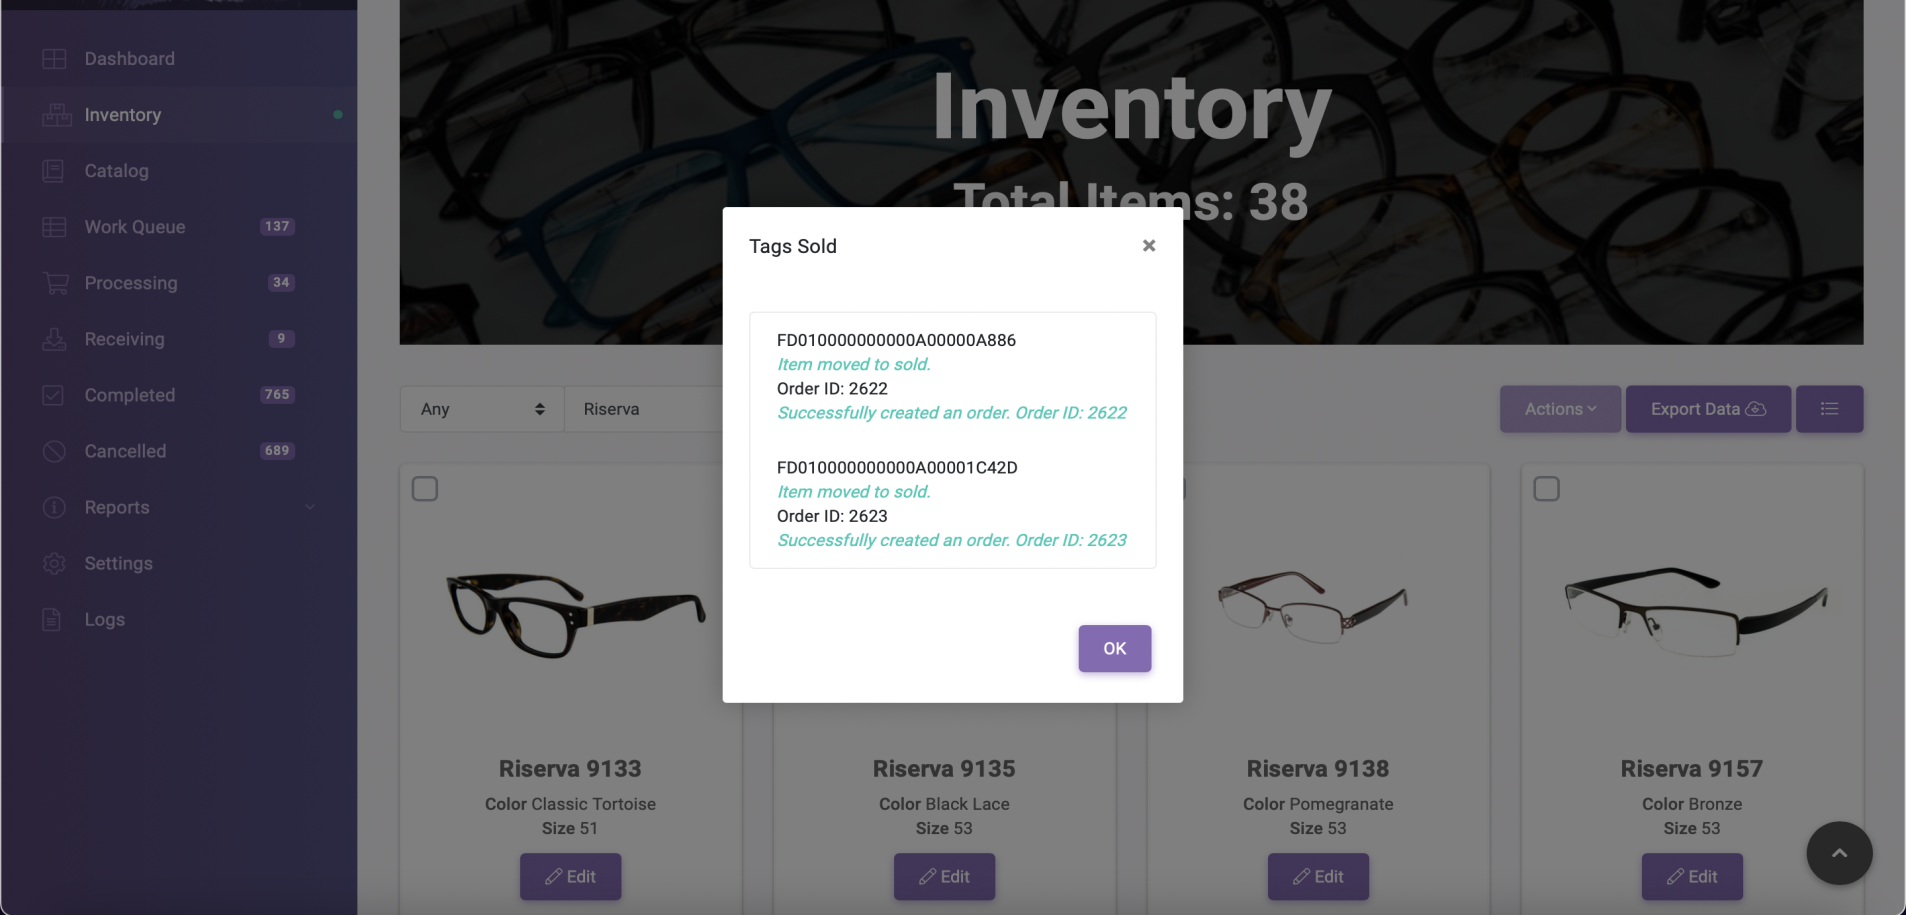
- The system will confirm all the moved items when successful.
- These orders will go into your Work Queue. Please navigate to the Work Queue page to continue the ordering process.
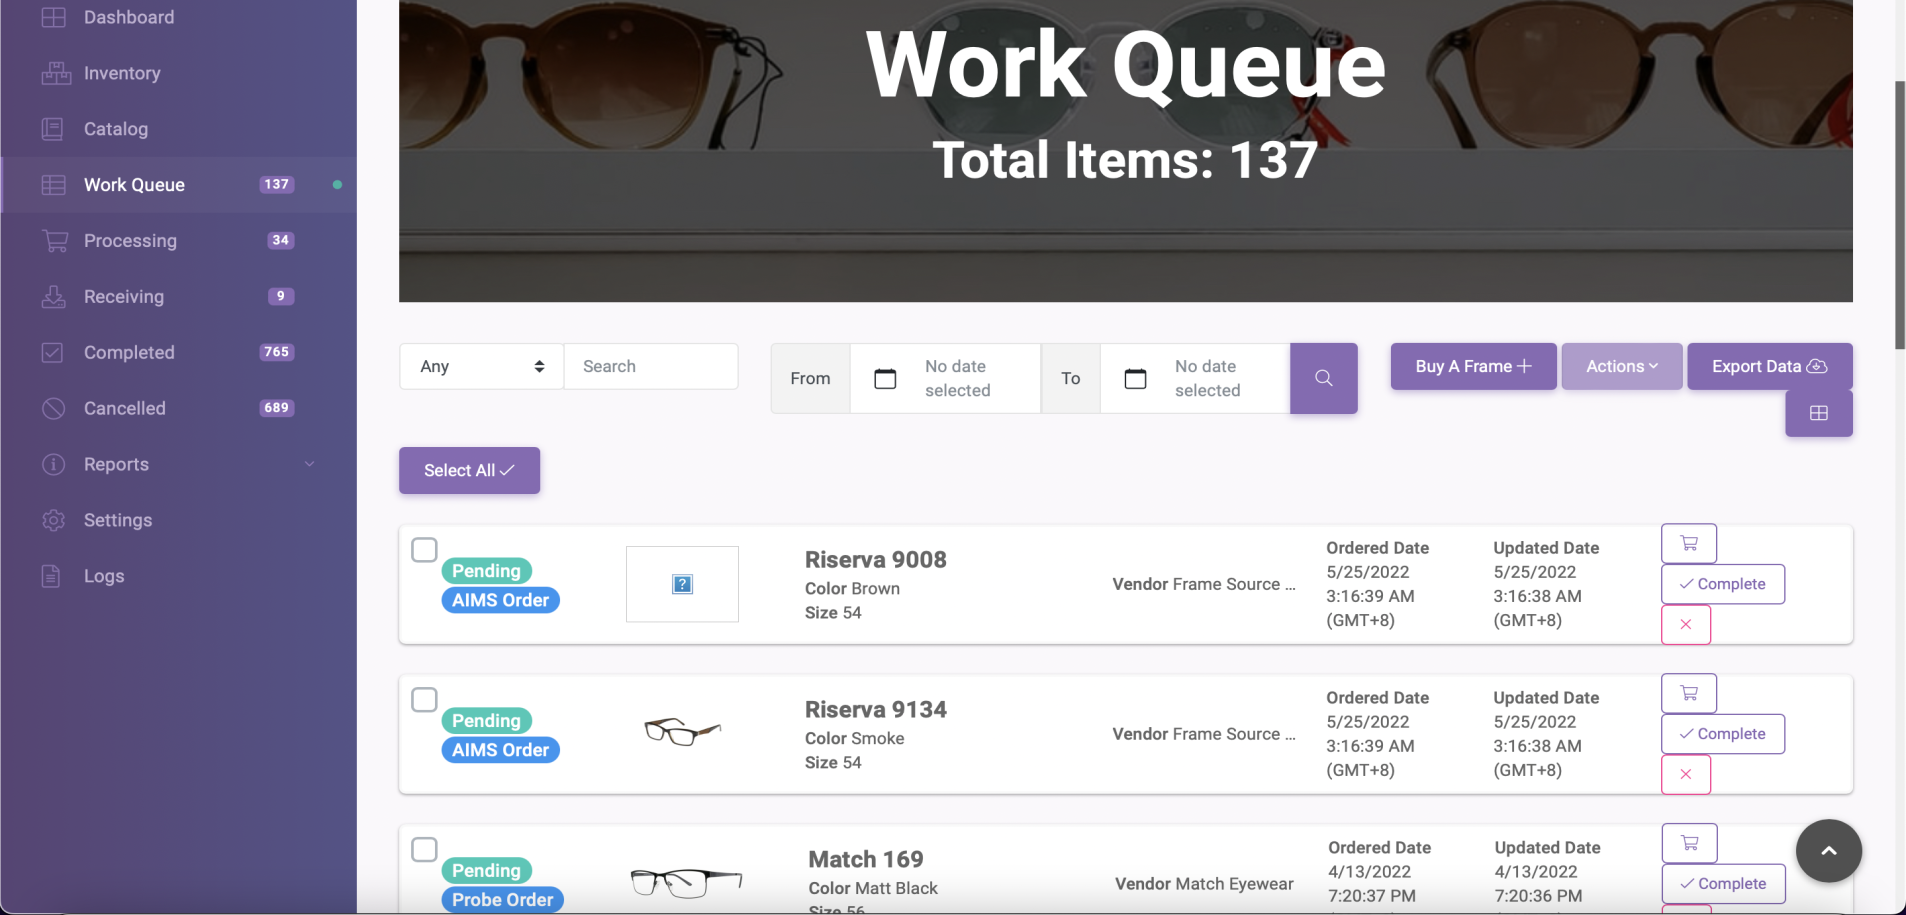
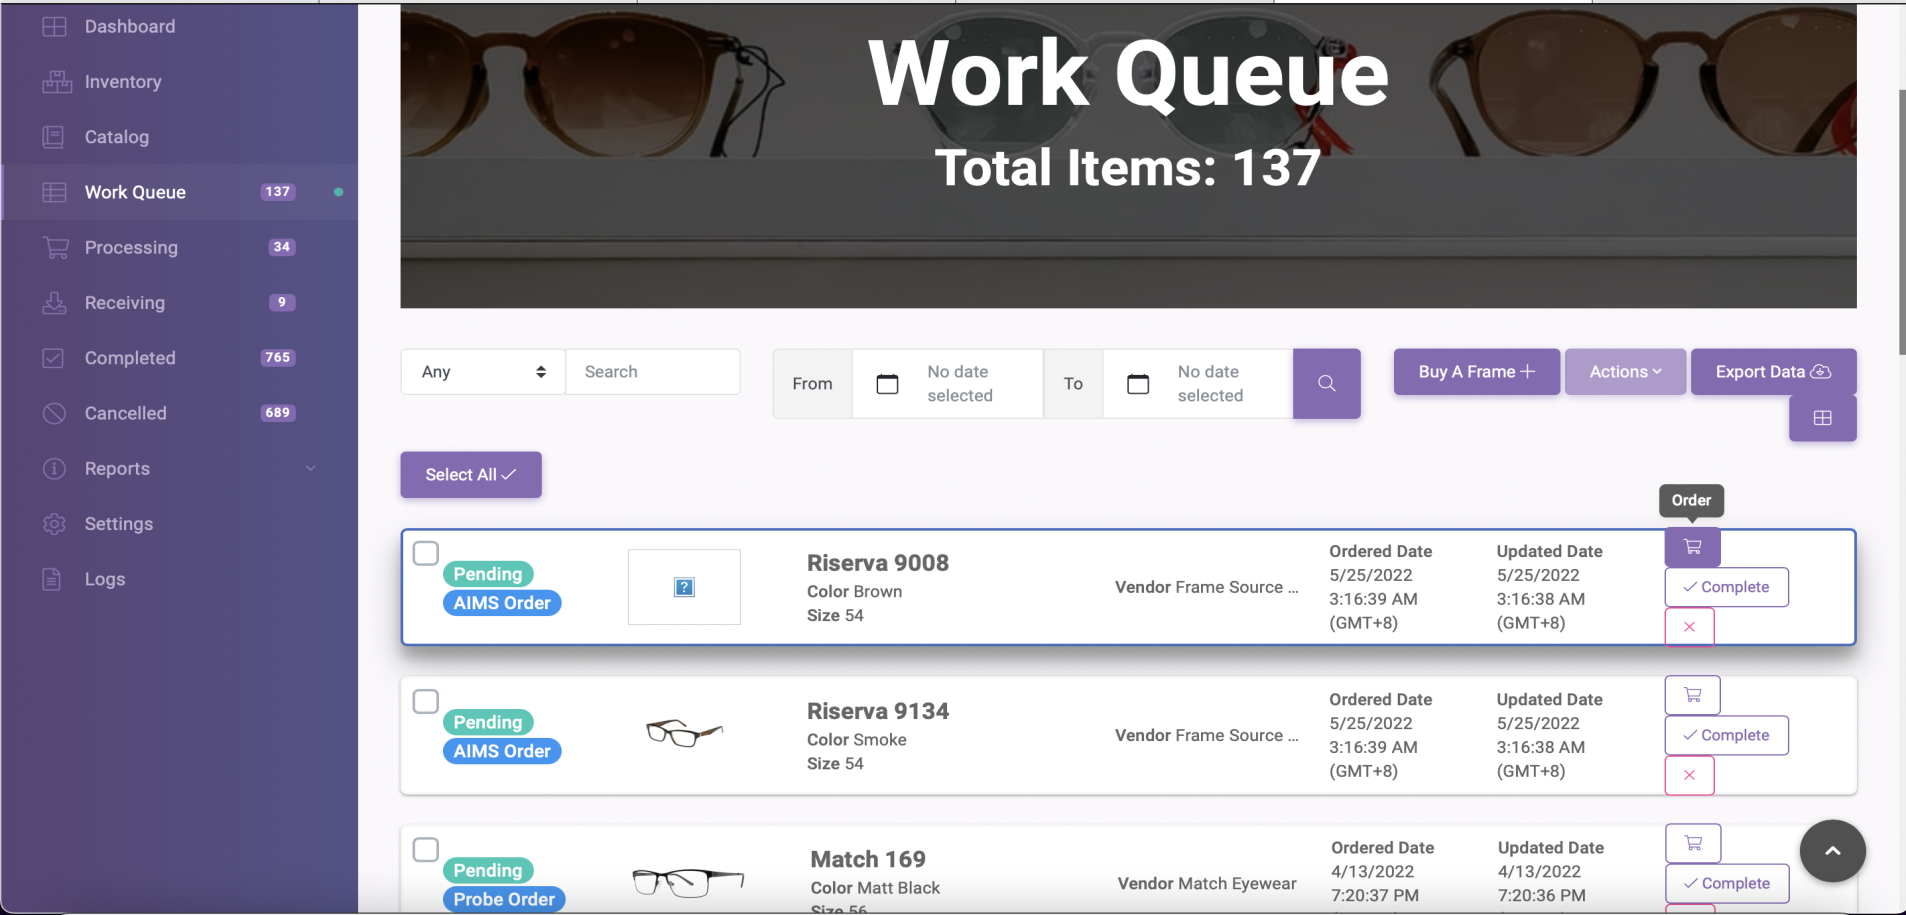
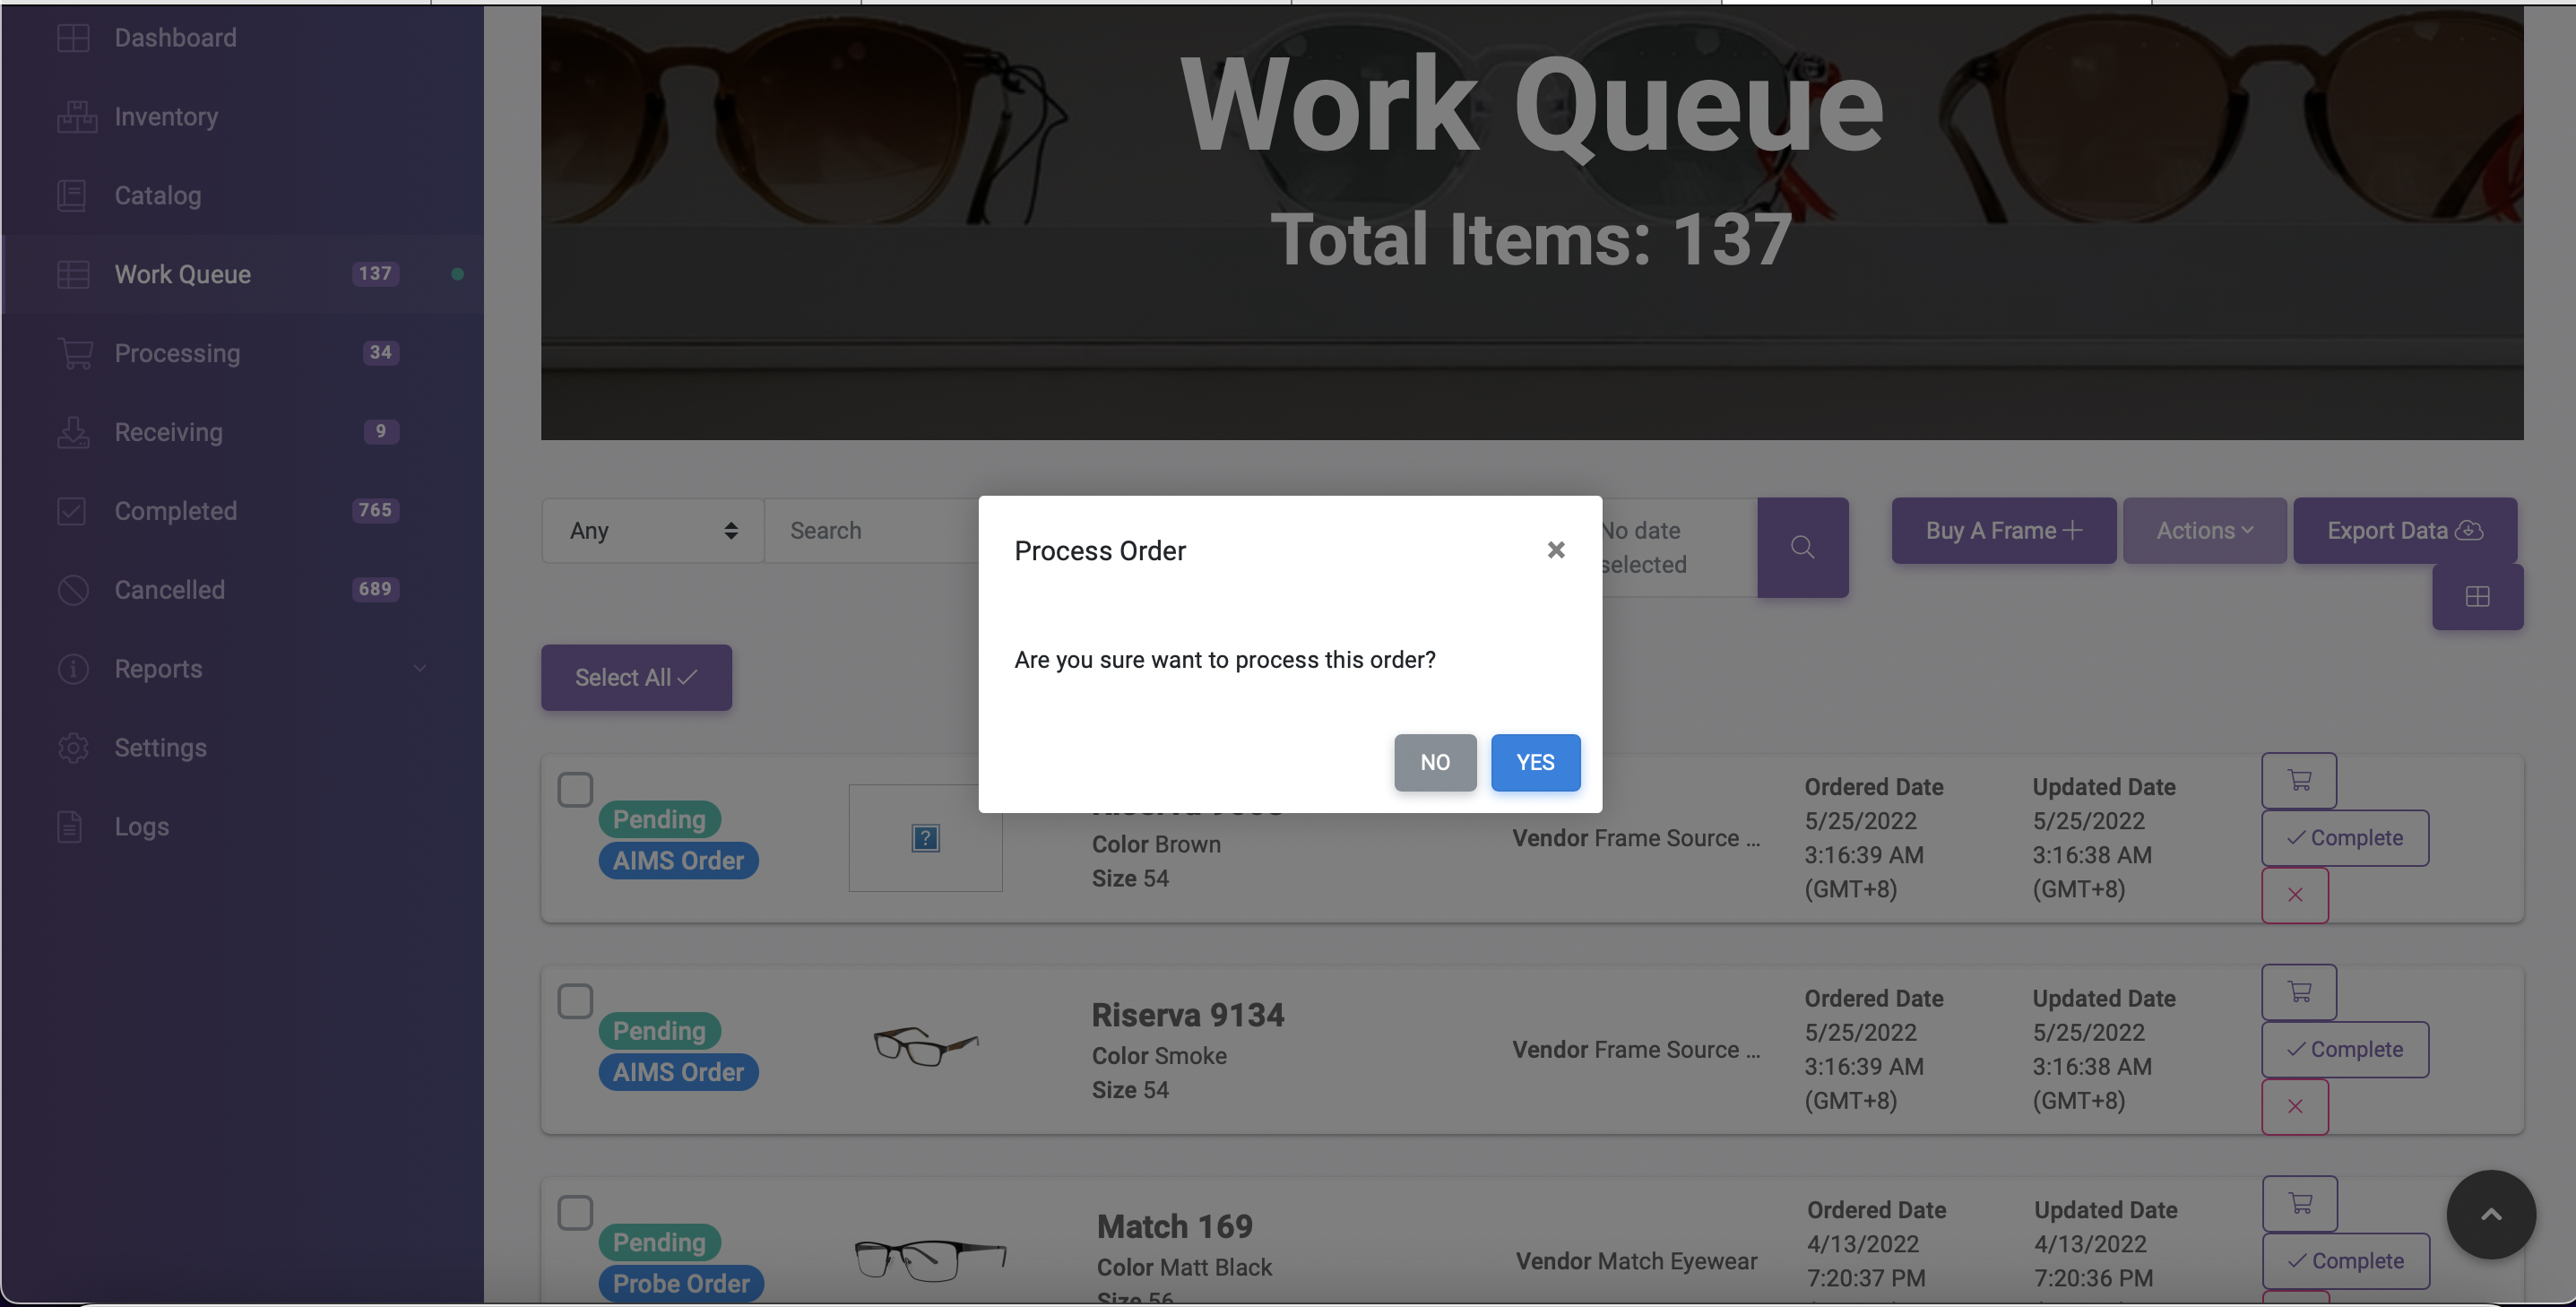
- Order the items by clicking the cart icon on the far right of every item row. System prompt will pop-up and click, Yes.
- The system will ask you where you want these tags to be delivered. If you're ordering for your store, please choose your store name in the list. If you want to dropship the order, choose any lab which suits you.
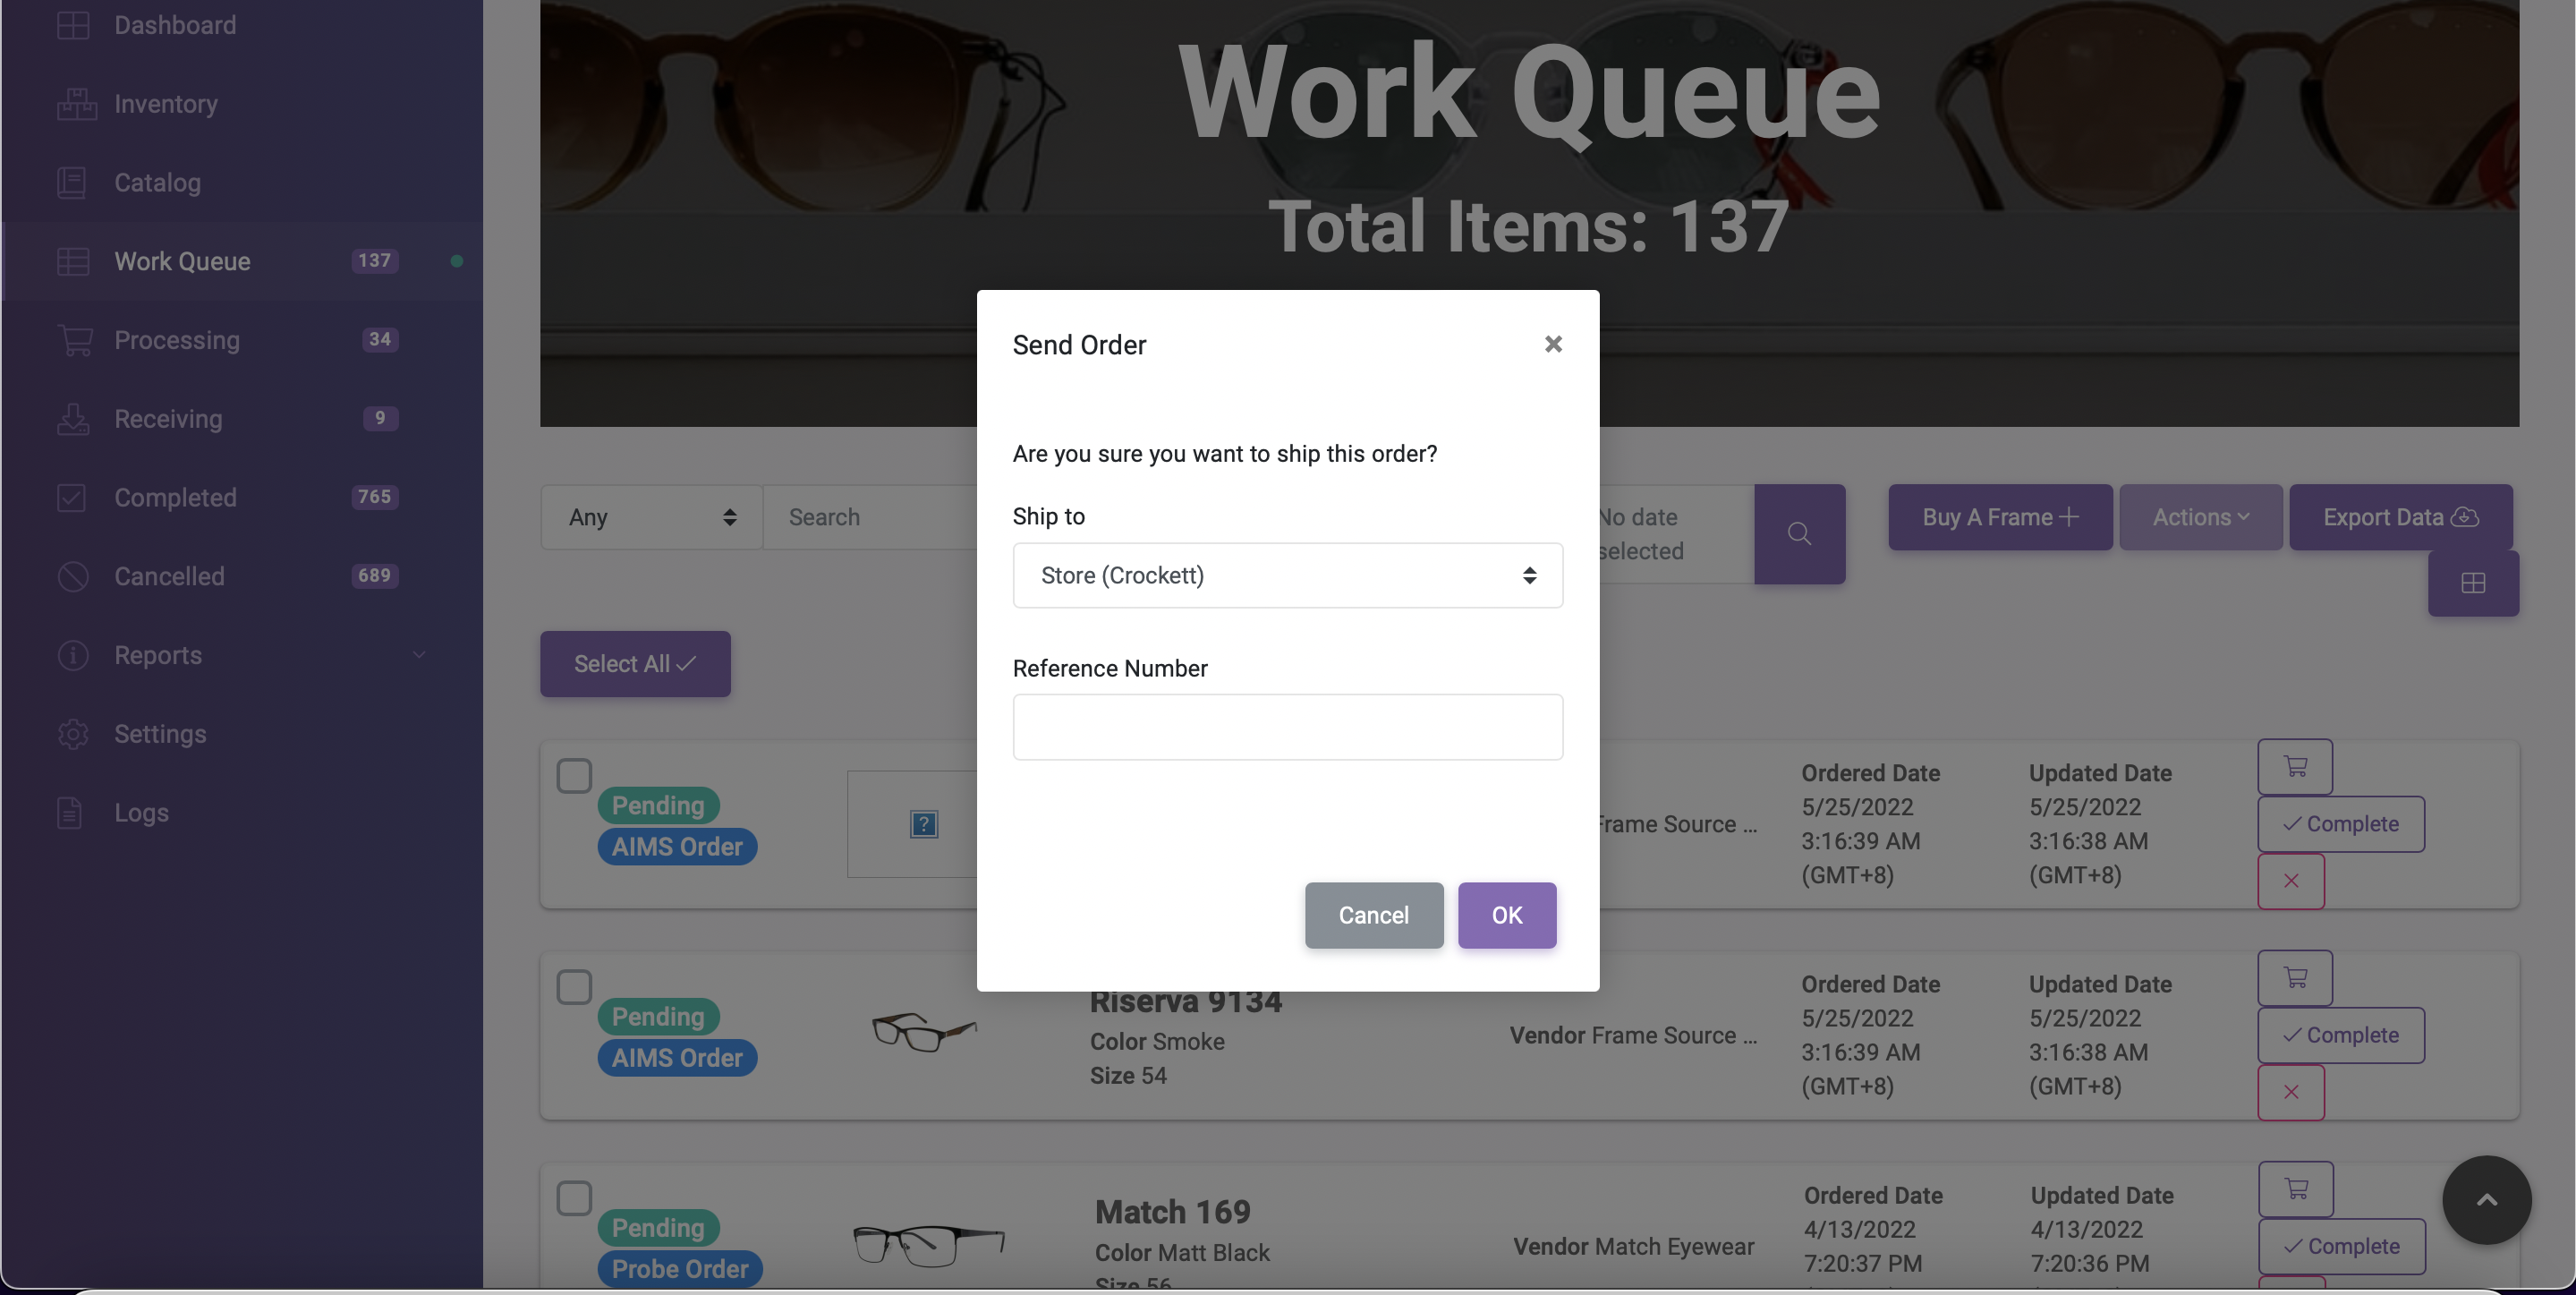
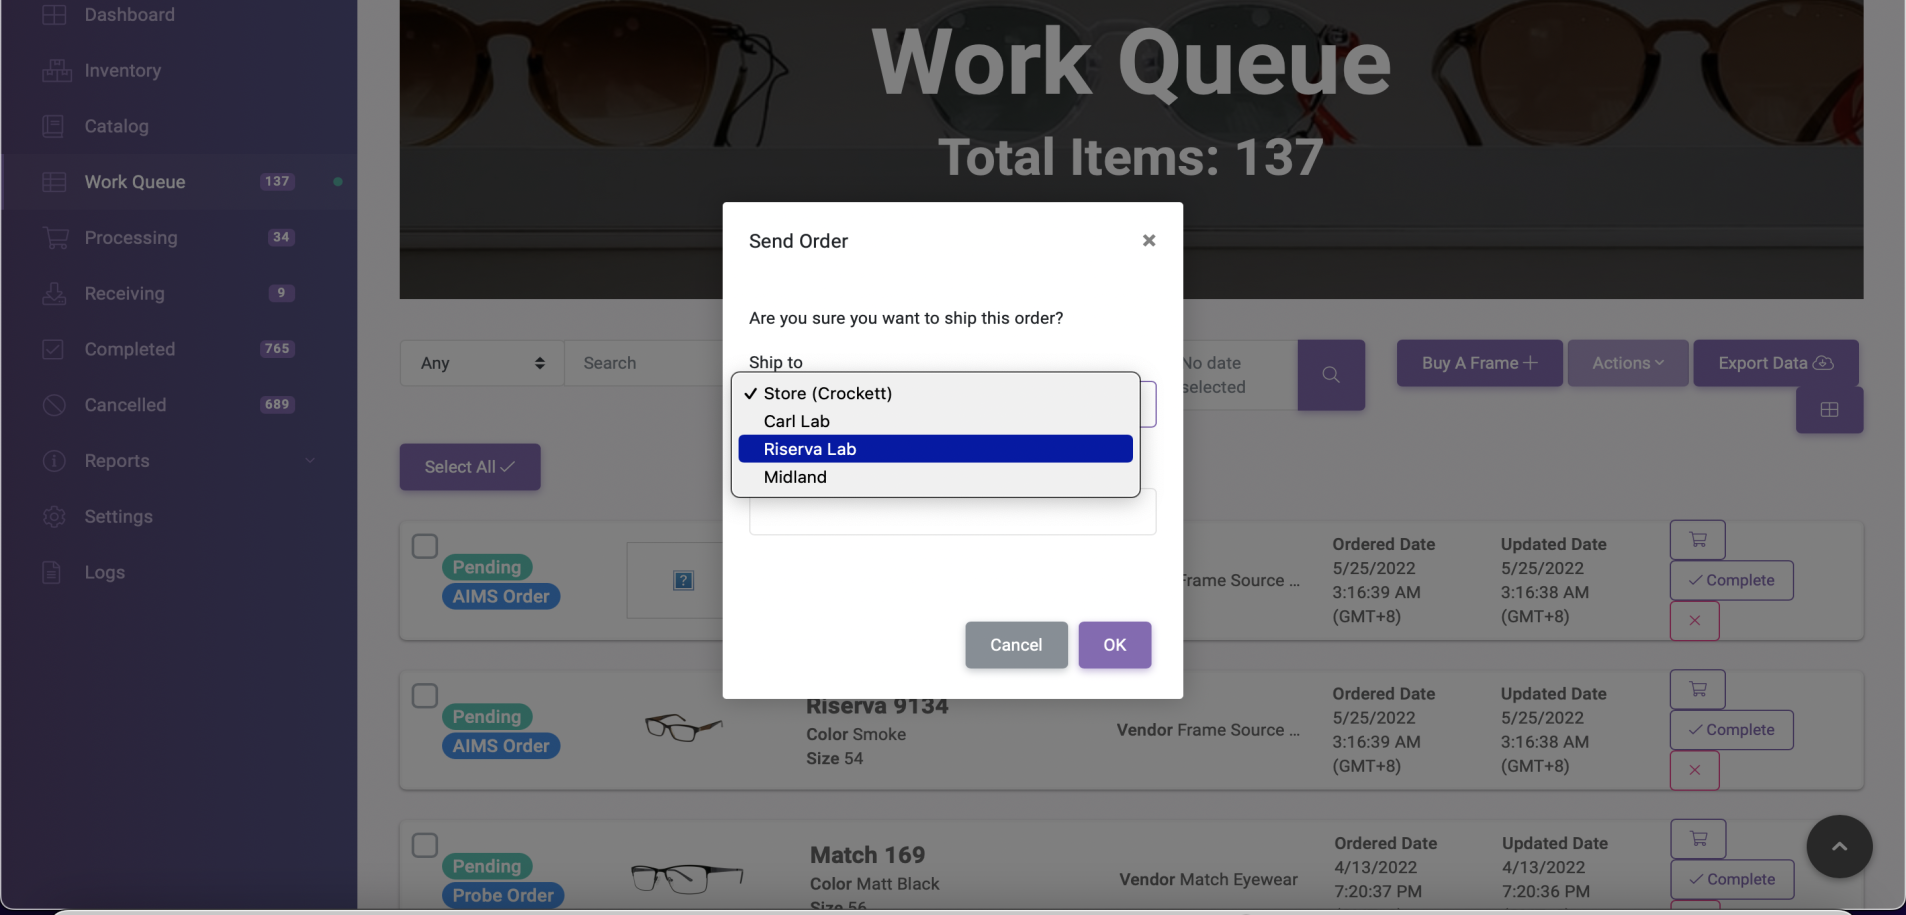
- For dropship order, enter the reference number coming from a third-party shipping app then hit Okay.
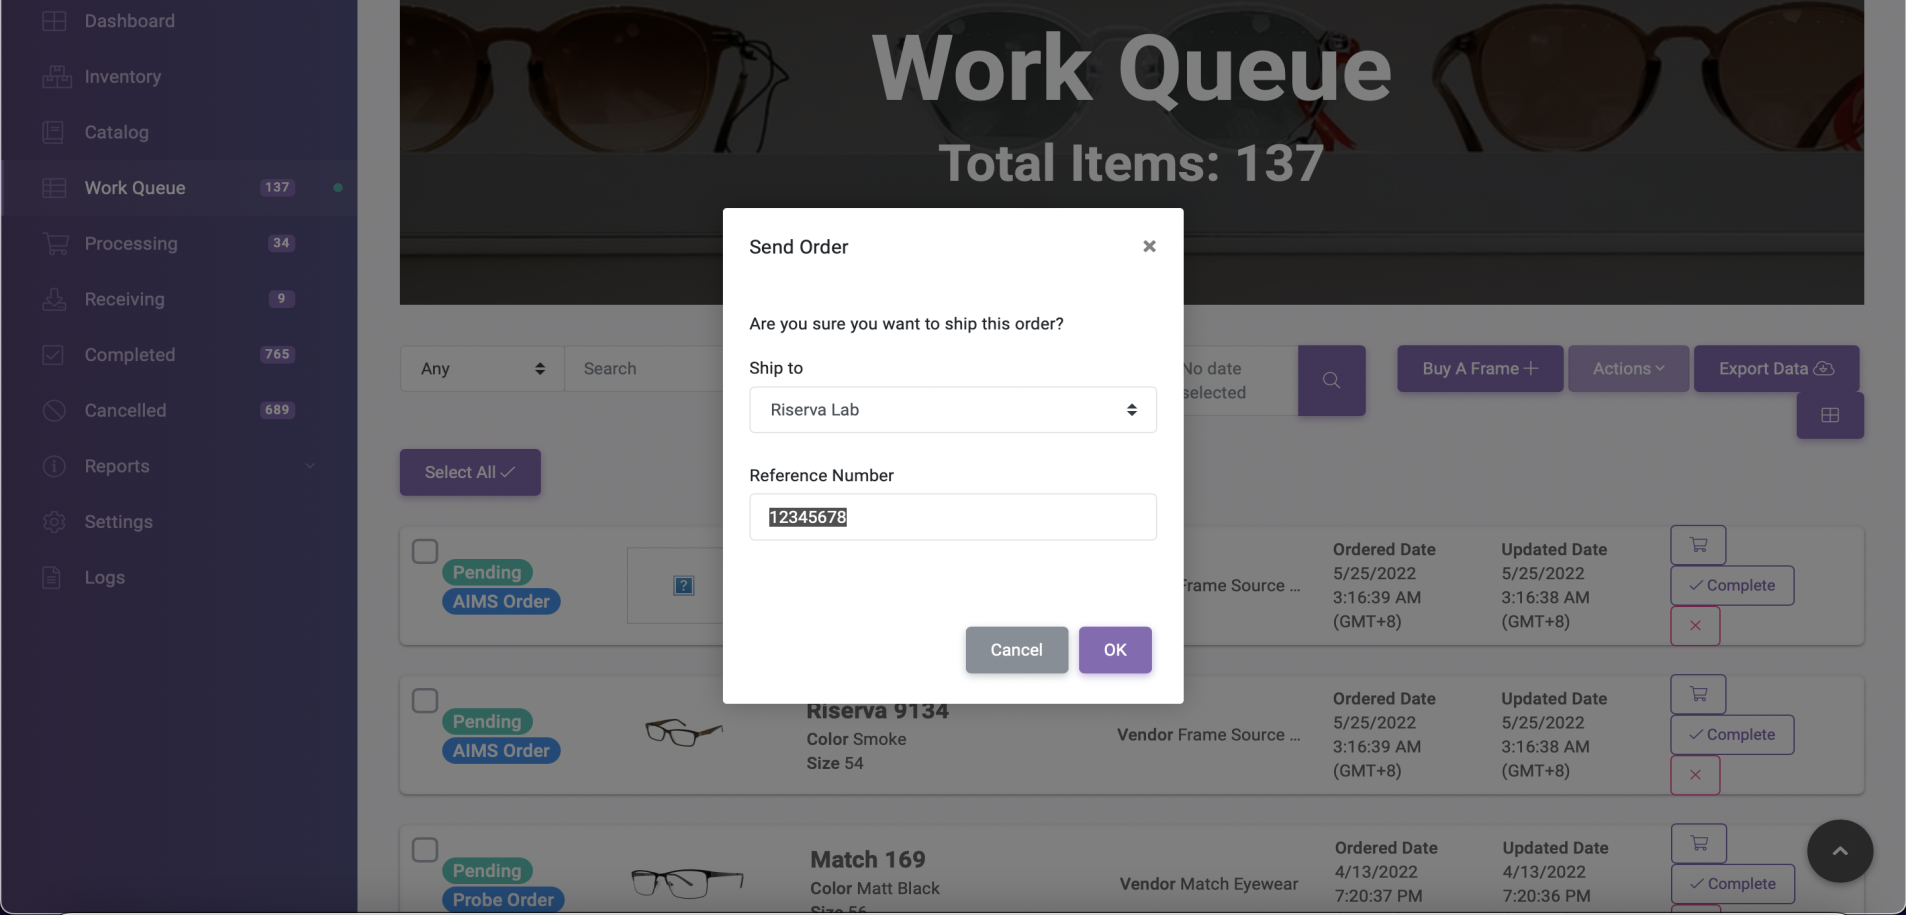
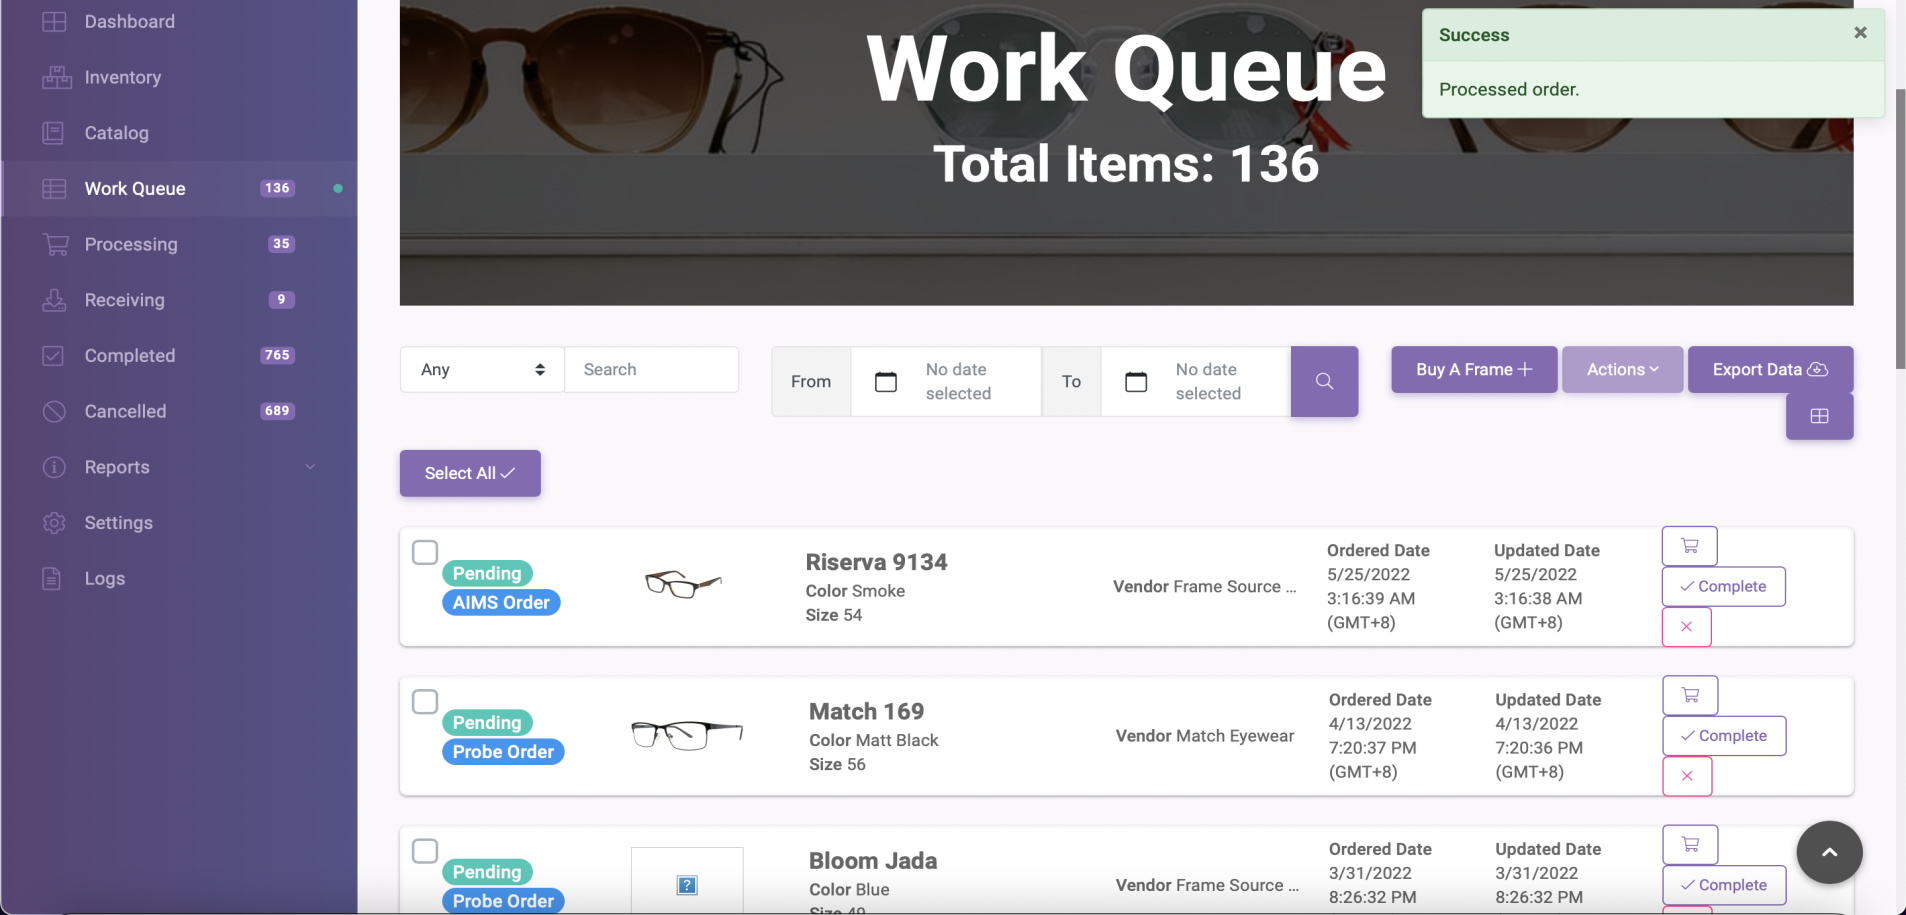
- When everything is in order and complete, you'll be notified that the order has been succesfully processed.
Note: When the Vendor succesfully confirms and process your order, the order will then go directly to your Receiving page. This means that your order is on the way to your store. As soon as you confirm receipt of the order, verify the completion of the order by clicking Complete in your Receiving page.
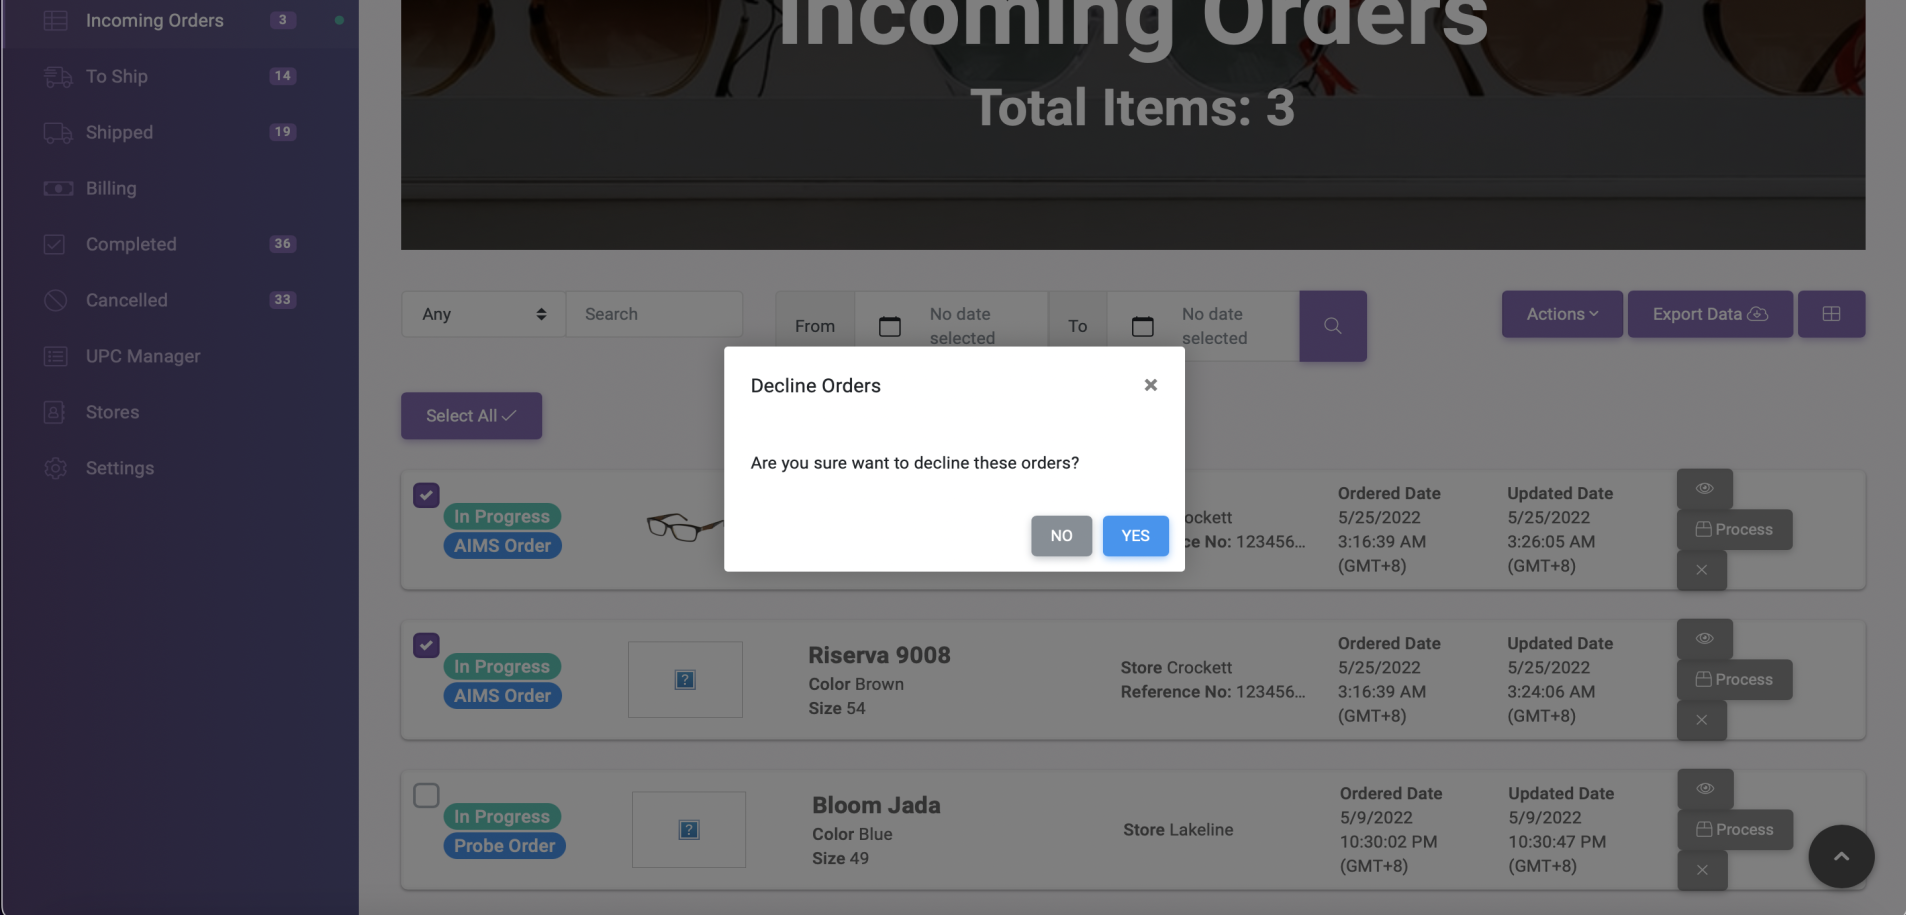
To cancel or change the frame you just ordered, kindly follow the steps below:
- In the Work Queue, click the X icon (Cancel button) beside the item row. The system will then confirm the cancellation of the order as shown below.
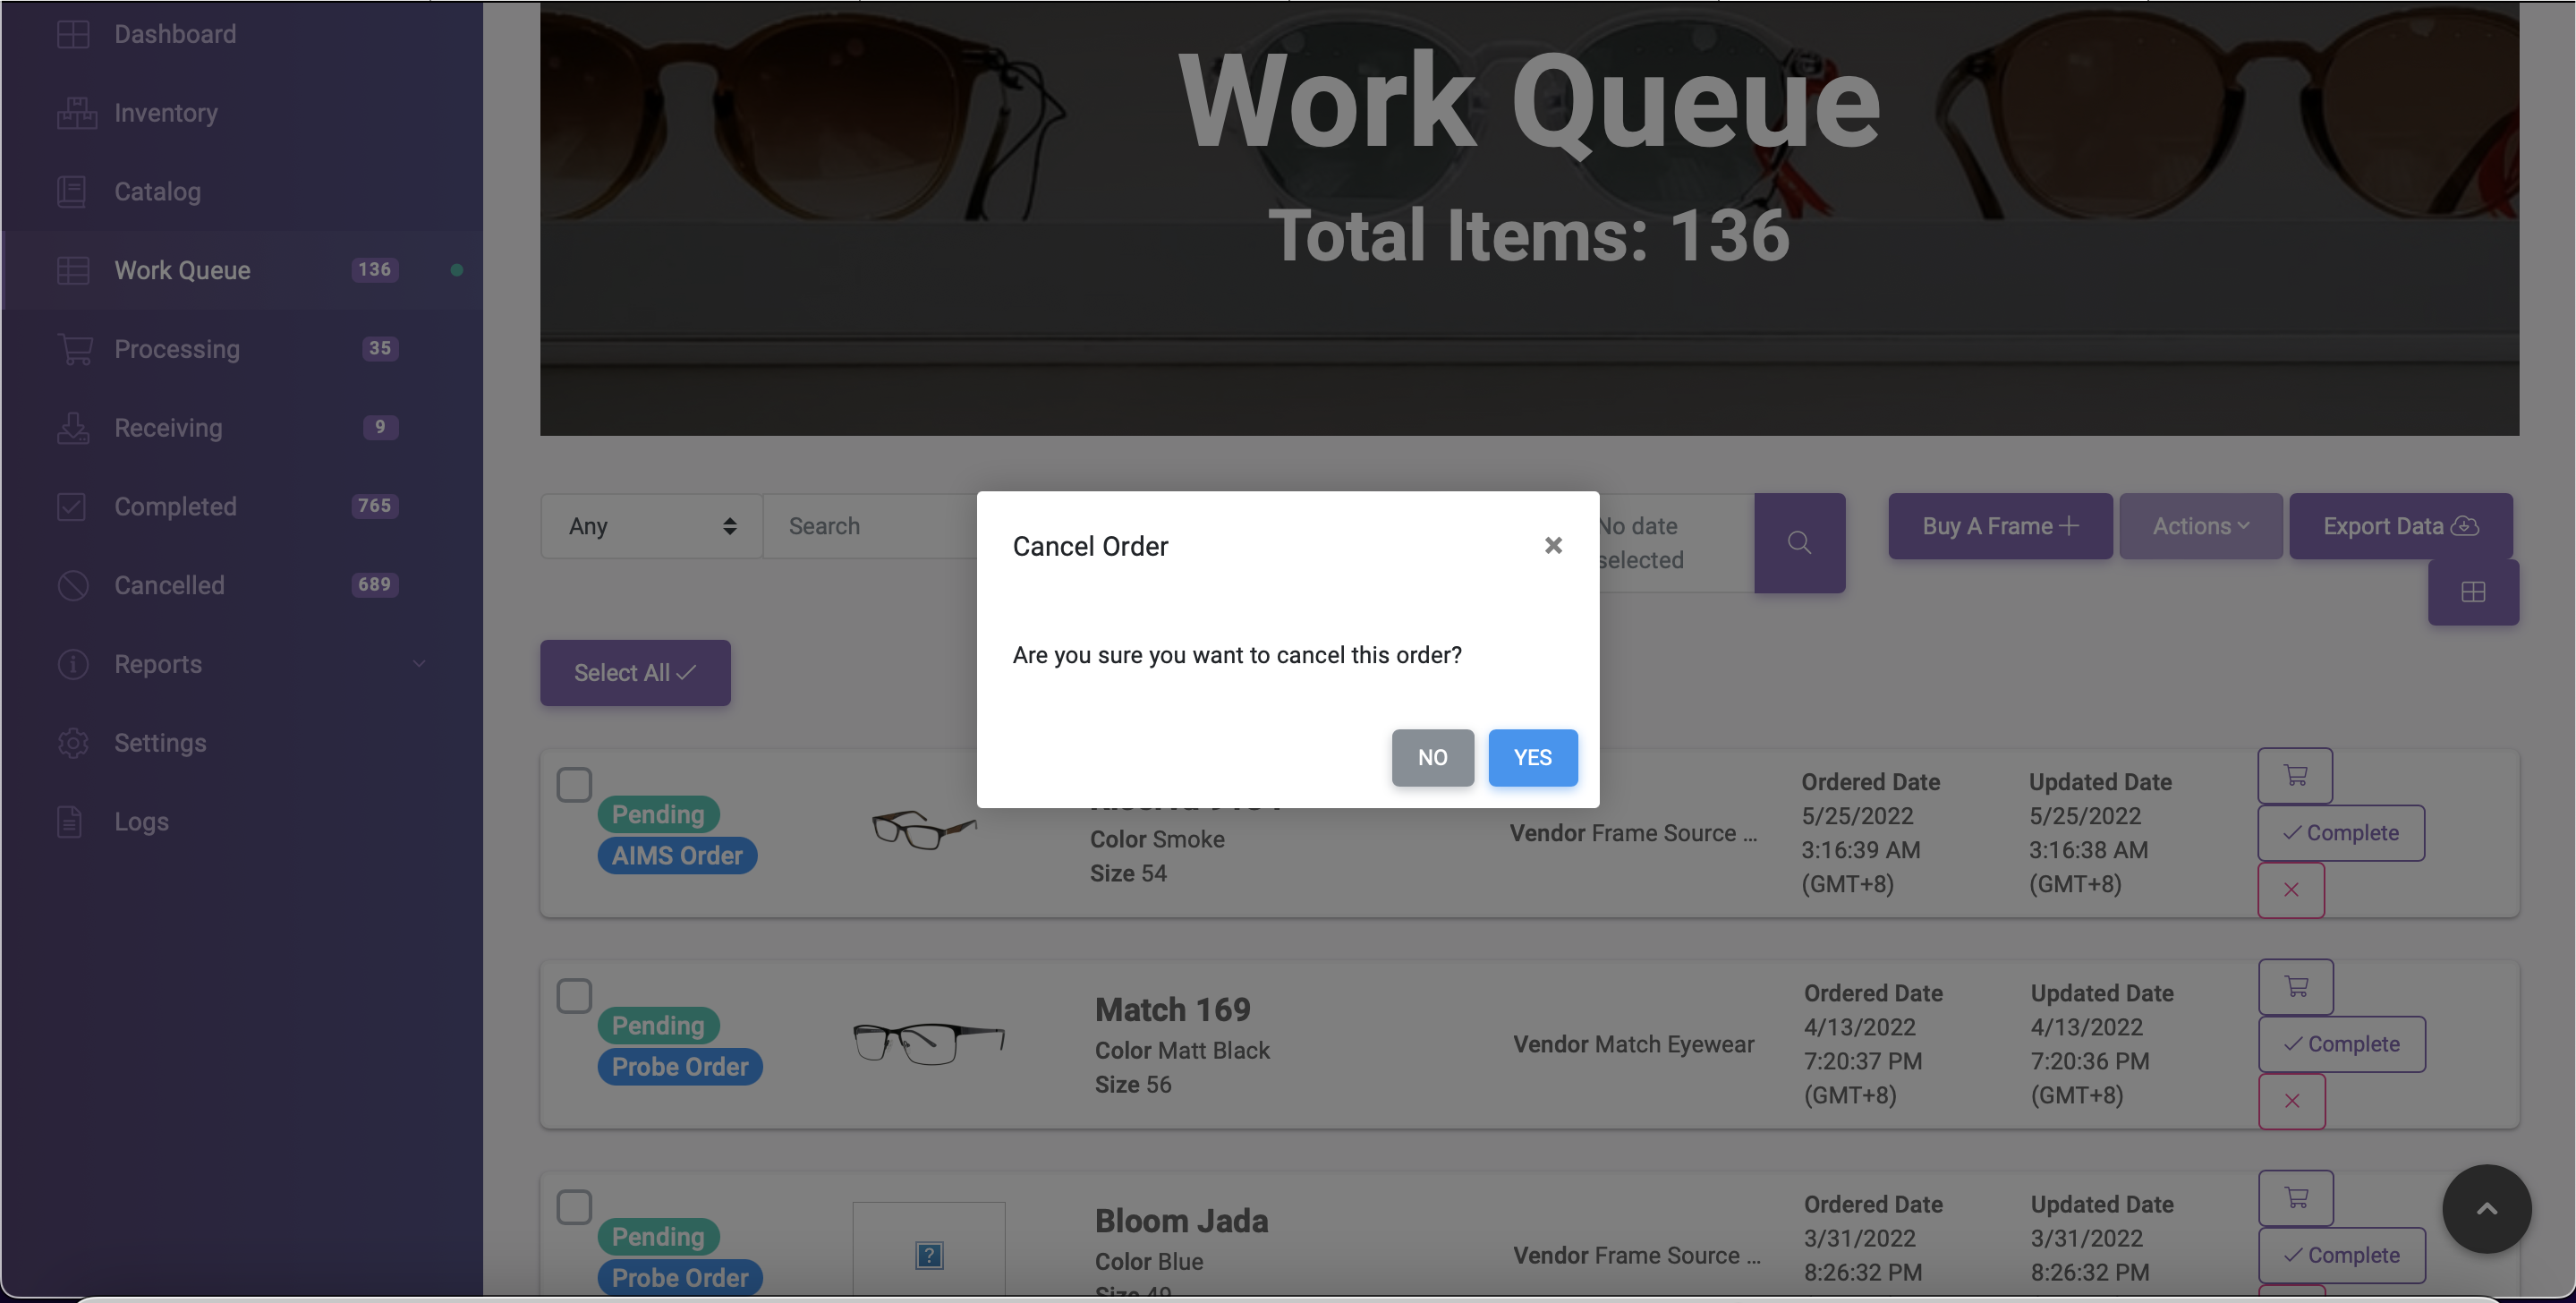
- Click Cancel to confirm the cancellation of an order.


The system has two options when processing an order in the vendor's queue. If it meets the minimum order quantity, it auto-accepts the order; if it doesn't, it gives the vendor 18 hours to confirm or cancel the order. This gives leeway to meet the service-level agreement of 72 hours in processing a store order.
In case your re-order or dropship order gets declined, please see the following steps below.
For declined drop-ship orders
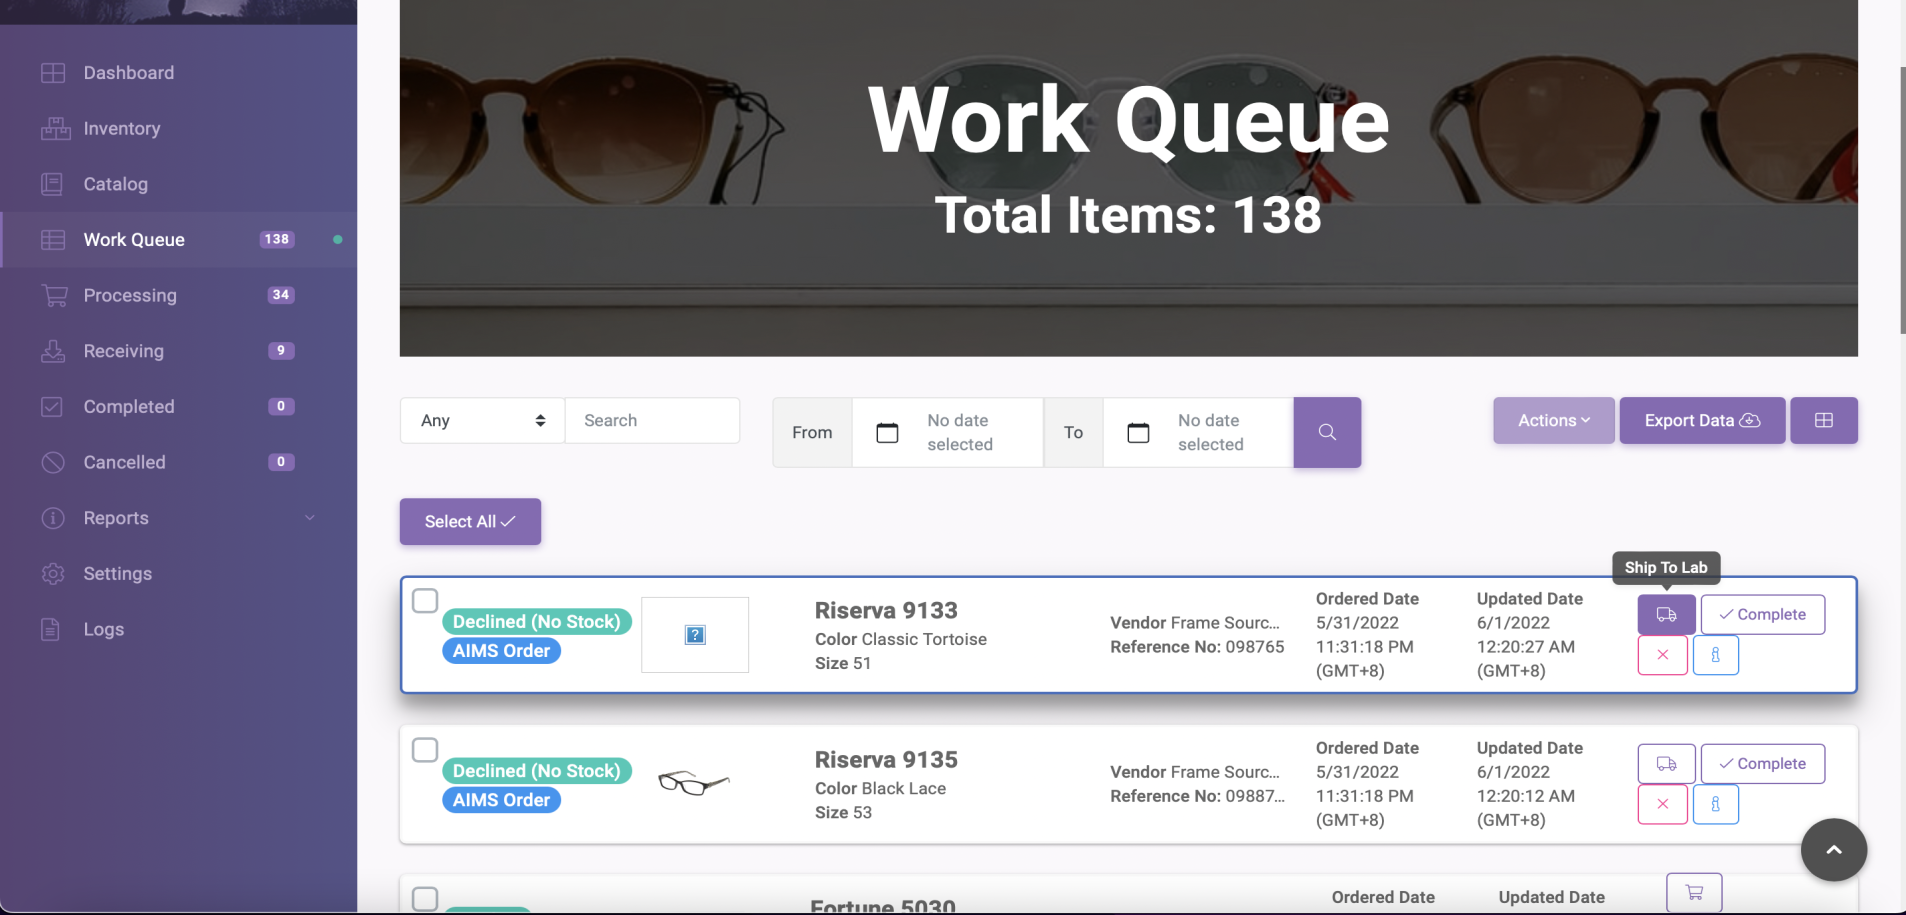
Your order will now be visible in your Work Queue, where you can select one of the three options: Ship to Lab, Complete and Cancel
Ship To Lab Button
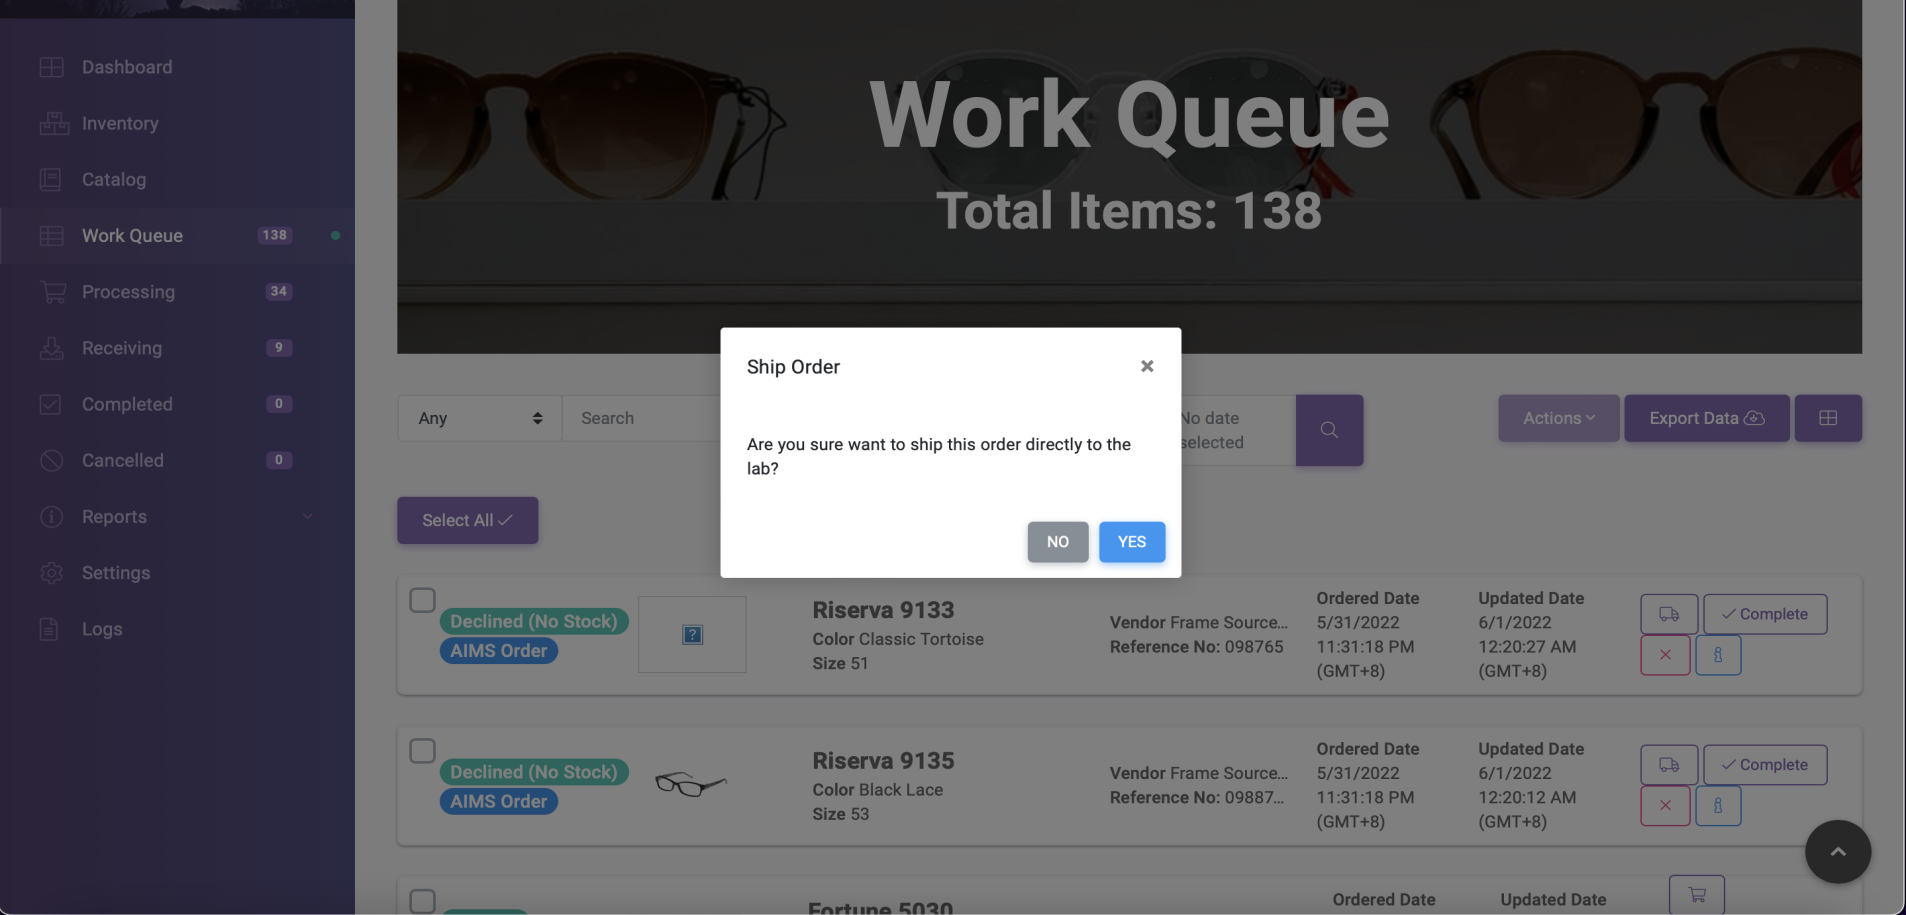
- If you want the order to be process directly by the lab, given that this is a drop-shipped order, click the Ship to Lab (Truck Icon) button.
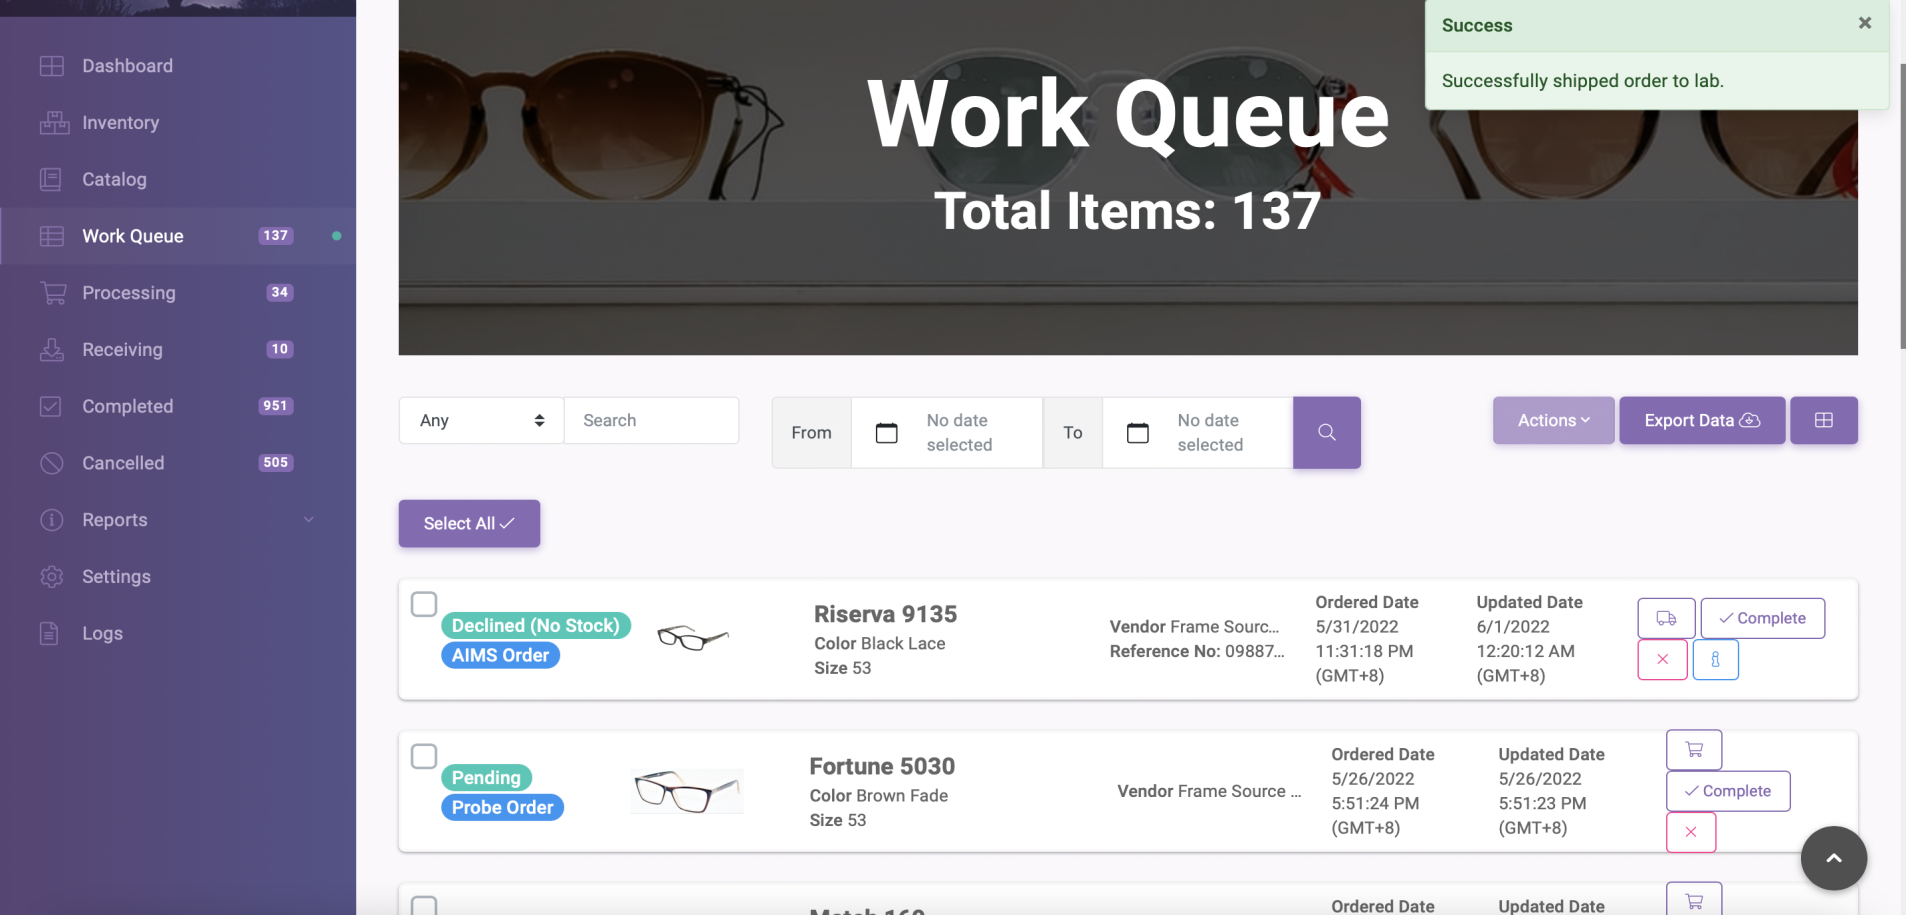
- The system will verify your action. Click Yes to proceed. System will prompt a success message afterwards.


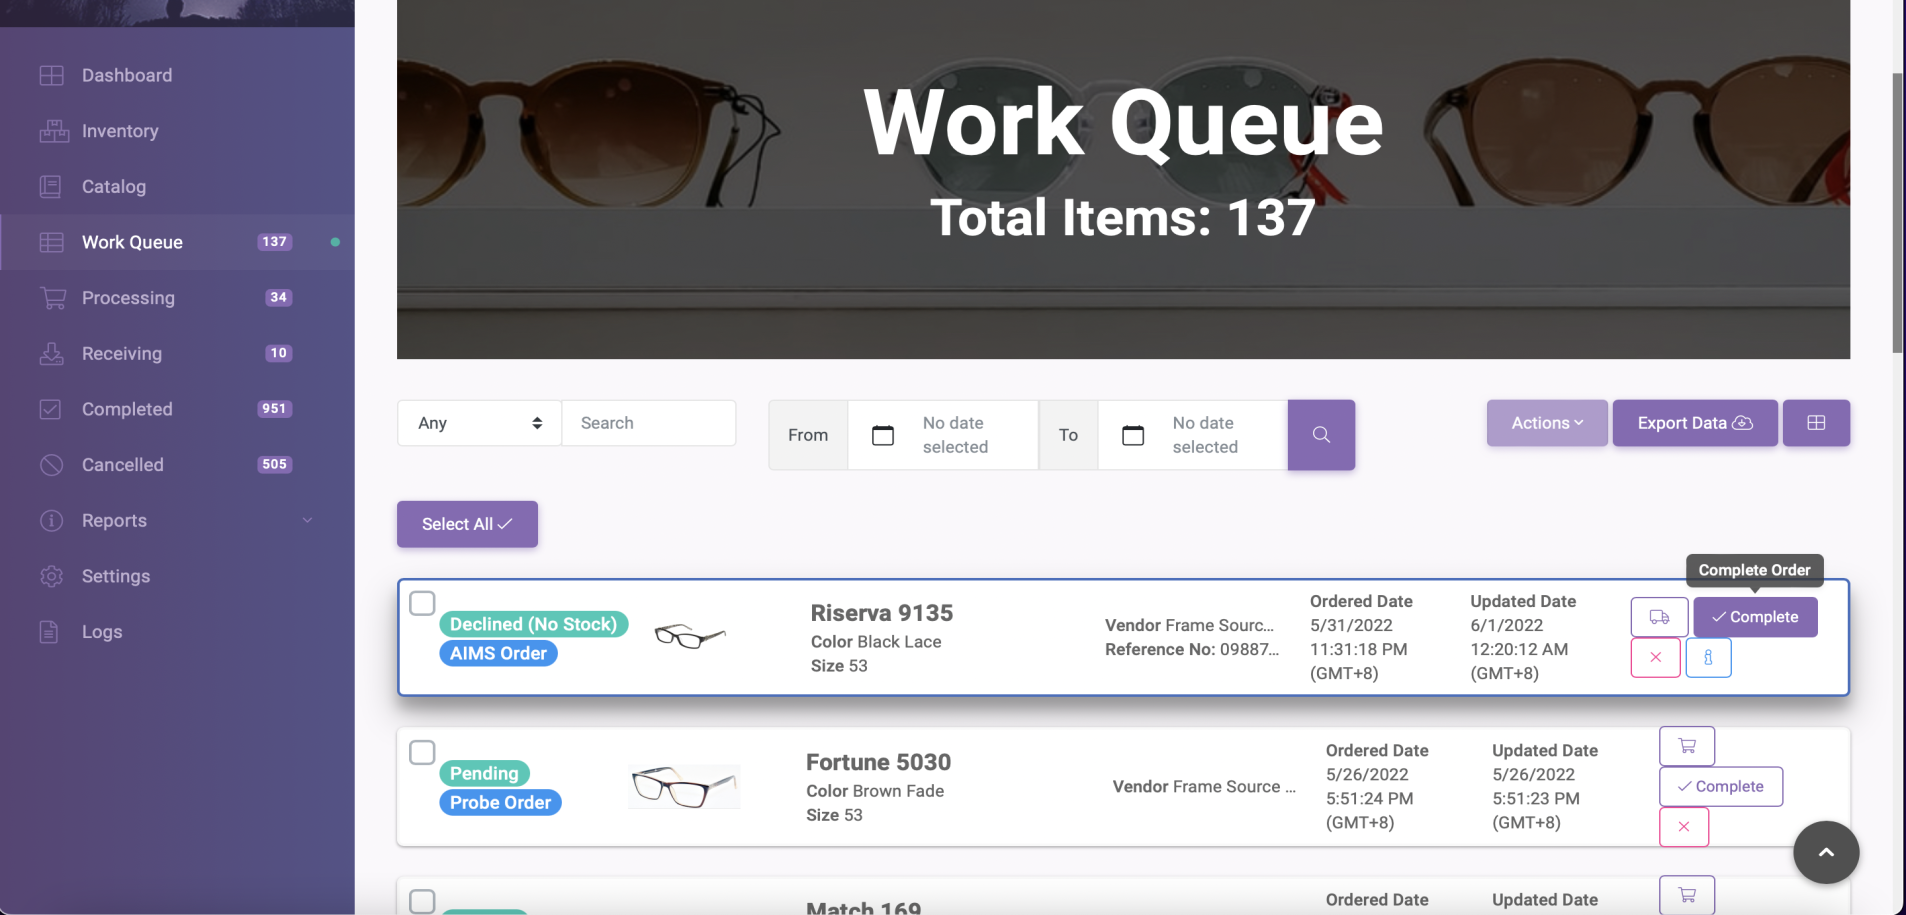
Complete Button
If you don't want to proceed with a cancelled dropship order, one of your options would be to mark the order "Complete". What this does is it moves the frame out of your inventory. It will remain unavailable in your inventory until such time you do another inventory session and the frame's information get scanned back into your inventory.
Please follow the steps below in completing a cancelled dropship order:
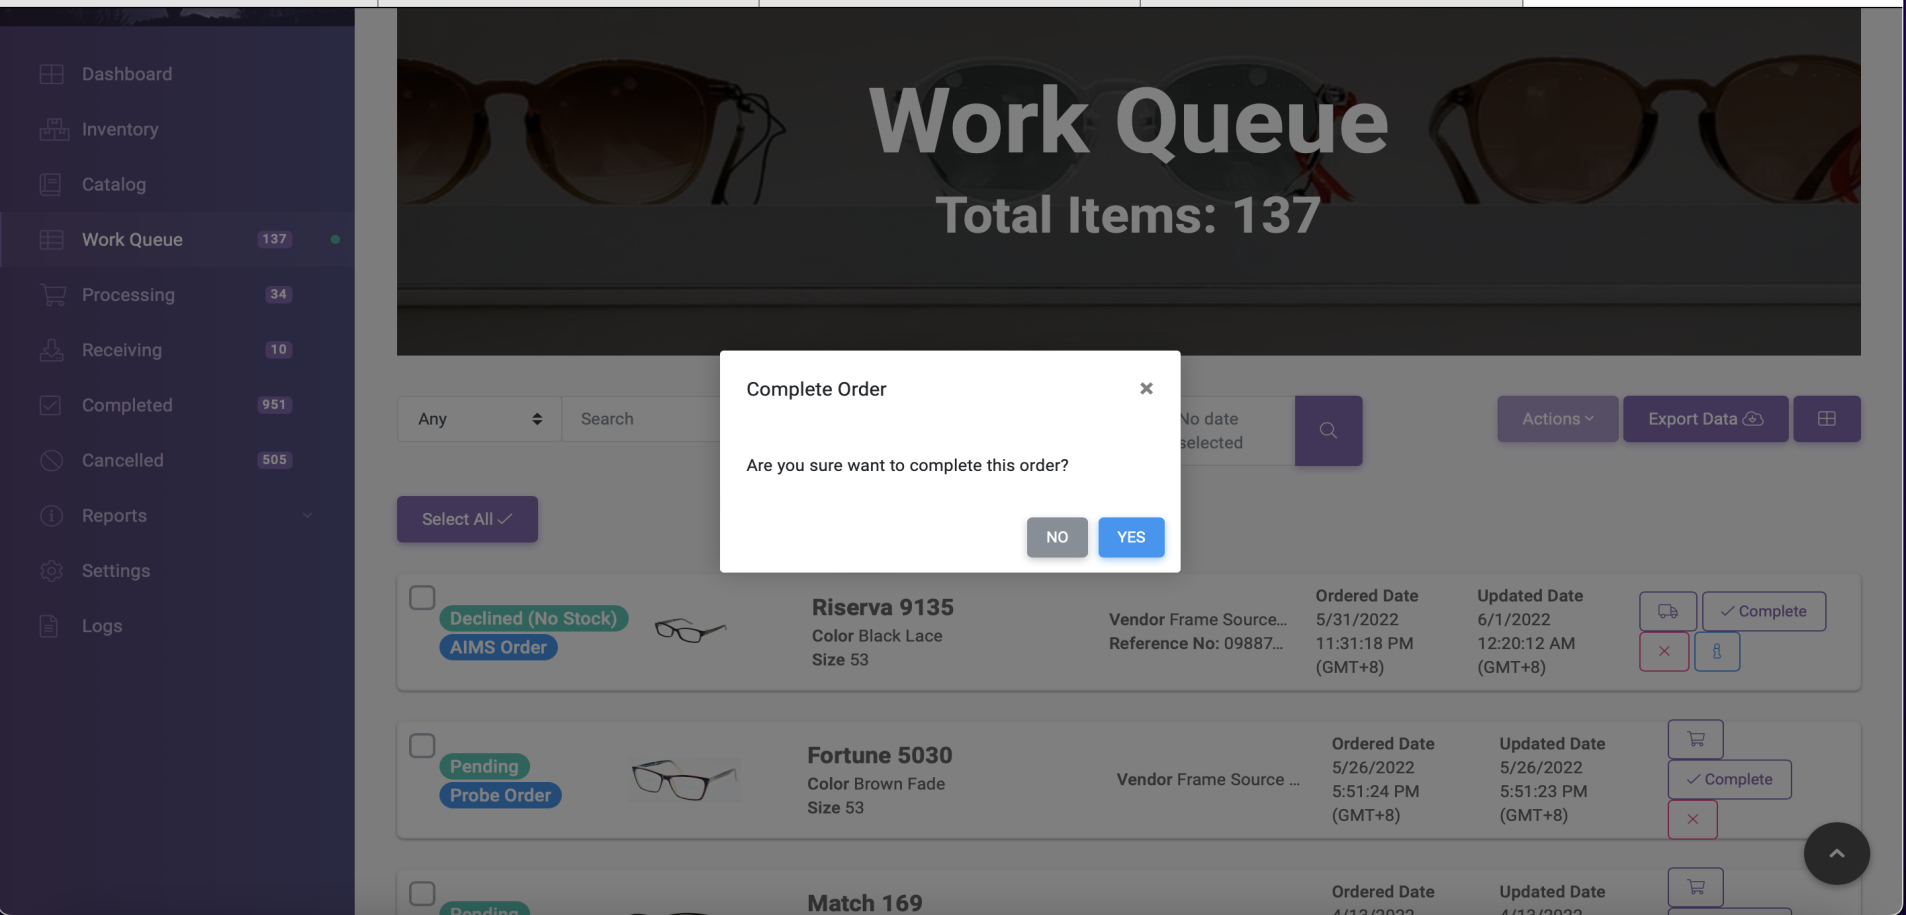
- The cancelled dropship order will show in your Work Queue. Click the Complete button as showed below.
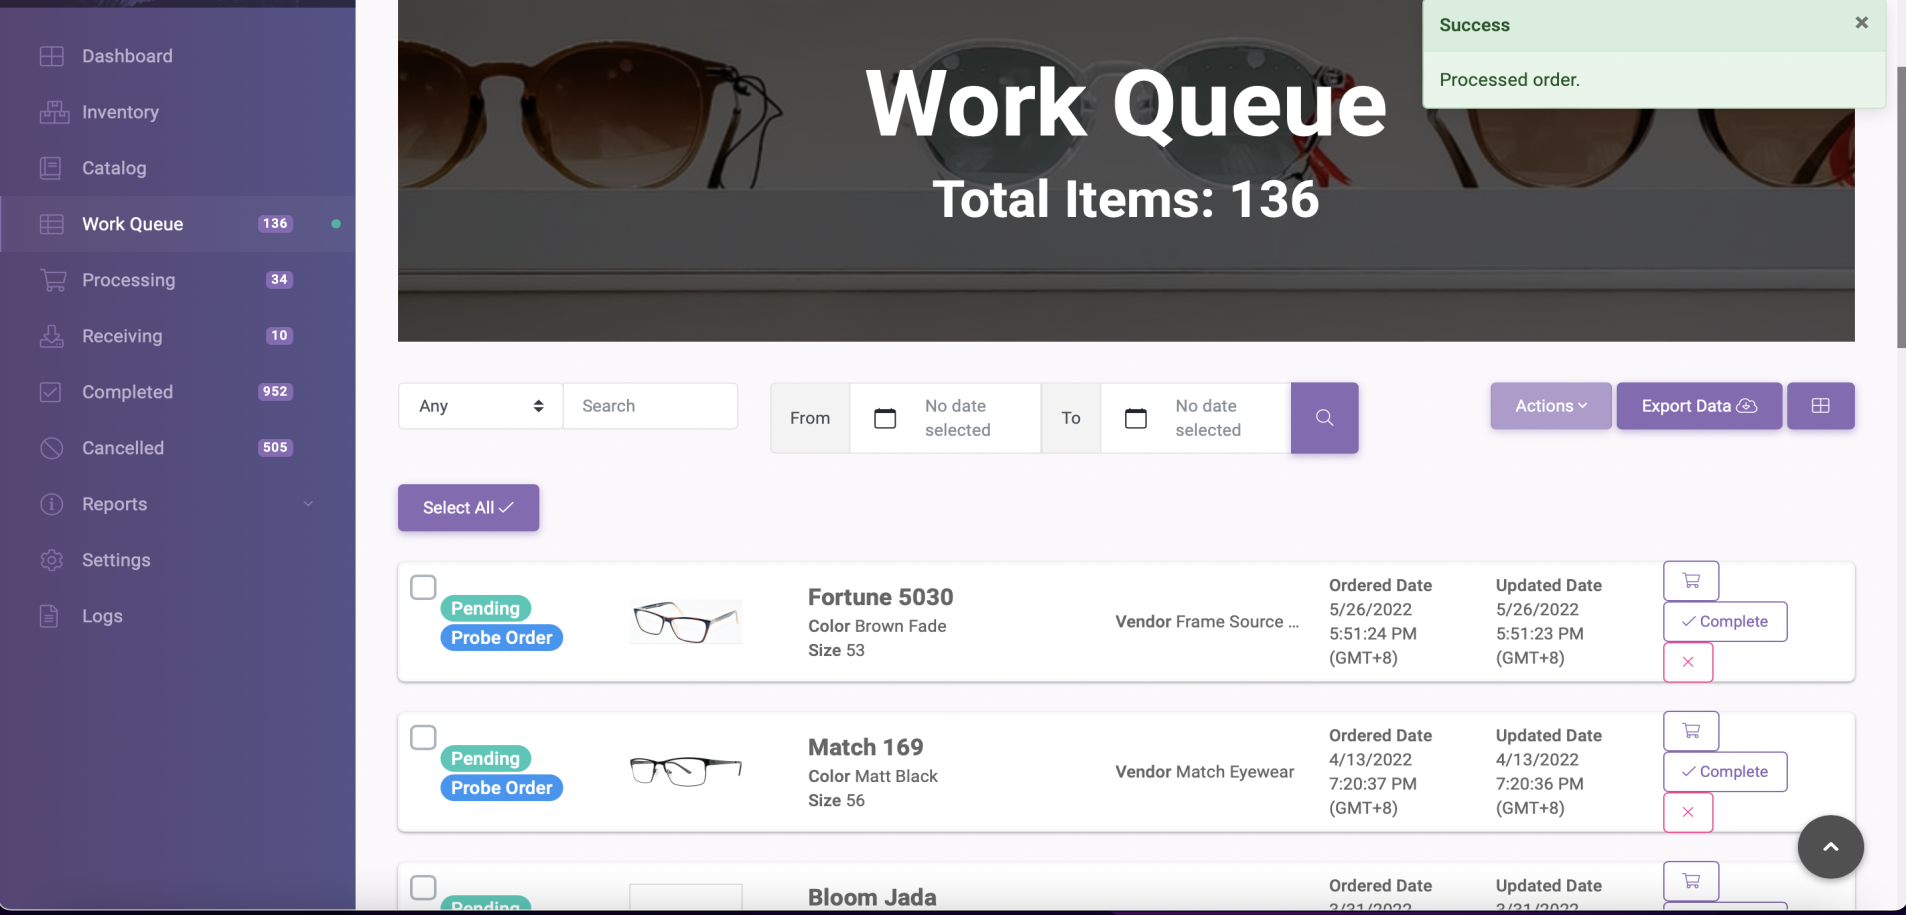
- The system will veryify your action. Click Yes to complete the order. Afterwards, a success message will prompt on your screen.


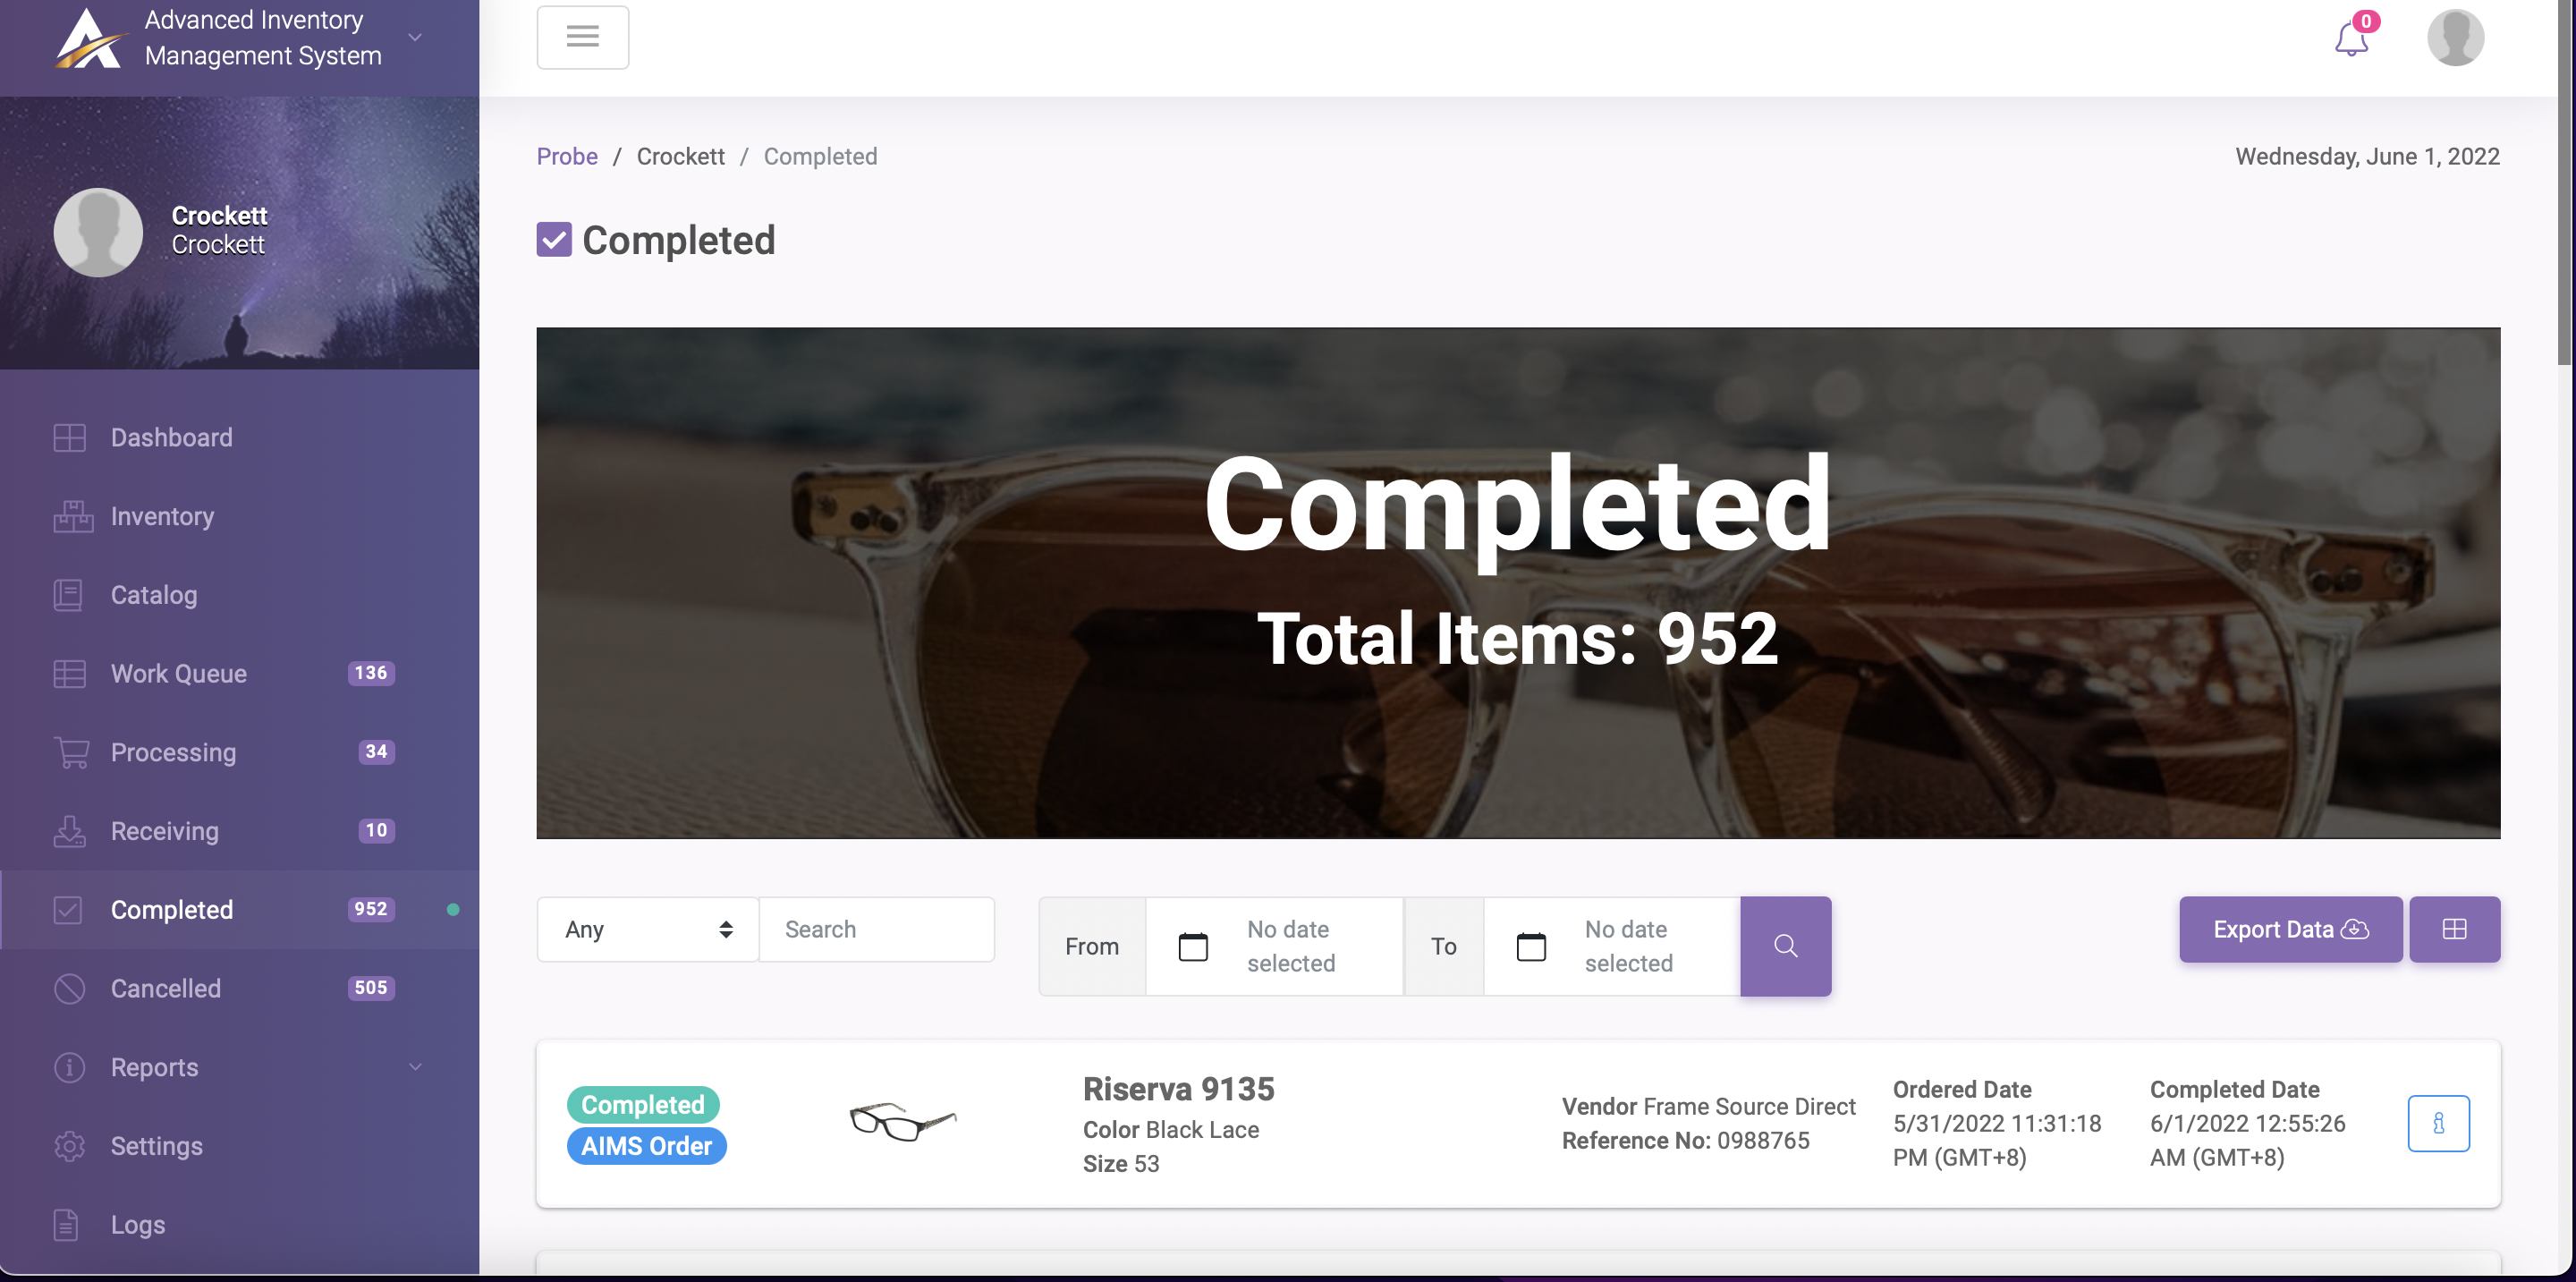
 3. The order will now move into your Completed orders page.
Cancel Button
If you want to cancel the order but still keep the frame available in your inventory, you must use the Decline Order/Cancel (X icon) button.
The steps on how to cancel your order is as follows:
- In the Work Queue, click the X icon (Cancel button) beside the item row. The system will then confirm the cancellation of the order as shown below.
- Click Cancel to confirm the cancellation of an order.